
Lots of useful information.
Tag: DIY
Self-Publishing – DIY Promo Tools
 With the ever growing sea of Self-Published books, it is easy to throw up one’s hands under the pressure. One of the most challenging aspects of the process is finances. Many Self-Publishers do not have the money to invest. However, with Self-Publishing being the desired avenue for most authors, it has become an industry of itself and as such, there are tons of avenues out there we can follow to ensure a professional product. There’s Fiverr for example, where one can purchase a book cover design for as low as 5-$10. There is low cost editing options and even people willing to do free book reviews. Below are 15 DIY tools to help Self-Publishers to promote their books for next to nothing by Tony Levelle. I don’t believe you’ll have to use them all or that they will all work for you, but I think this is a good start for anyone looking to Self-Publish: I intend on using some of these bullet points myself and so I just thought I’d share them:
****************************
No matter what kind of book you’ve written (or plan to write) there are many ways to reach your audience. Each of the DIY tools listed here is low or no-cost, and each of them works in its own way. One or more may be perfect for you.
1. Start Early
The most powerful and essential steps you can take toward promoting your book begin long before the actual writing of the book. Three years before the book is published–if you can–start building a network of supporters and reviewers. Keep track of everyone you meet as you research and write the book. Pay special attention to, and make notes about, those who demonstrate a genuine enthusiasm for you and your project.
As the project evolves, keep in touch with these people. You might send them an occasional email or keep in touch via a social networking site like LinkedIn or Facebook.
For significant milestones–the signing of your book contract, the completion of the manuscript, the arrival of the galley proofs, and the arrival of the finished books–you might bring key people together for a house party. At the house party, you could read short excerpts from your book and answer questions about the project.
2. Contribute to Web Forums
Every field has at least one or two forums that people interested in your subject know and read. Find and join these forums.
Contribute to them freely. Give advice and reach out. Offer to help others. Put a link to your blog or website in your signature line. When you have a book contract and/or a book title, add the title to your signature line.
3. Start a Blog
Early in the process of researching and thinking about your book, start a blog. Add 120-130 words each day of helpful, inspirational information on issues in your field, which are related to the subjects in your book. Aim to create a genuinely useful body of knowledge over the following 12 months.
4. Write a Remarkable Book
Set out to write a remarkable book. If your book is not remarkable, keep working on it until it is. Give the manuscript to ten friends and ask for honest feedback. Find a brilliant editor (you can find such an editor at EFA) and pay him or her to edit your manuscript. Revise. Repeat. Don’t stop until your reviewers start saying things like: “I loved it! This book is amazing!”
A remarkable book will generate word-of-mouth publicity. One person will read it, and recommend it to his or her friends. They will recommend it to their friends. This is the best publicity you can get.
5. Cultivate a Positive Attitude about Book Promotion
Think of book promotion as storytelling. The story you are telling is why you wrote your book, how it can help others, and how the world will benefit from your book. If you can develop a positive attitude about book promotion, people will pick up on it, and tune in immediately. Some writers resent the chore of marketing. Their attitude seems to be, “I’m a writer. Marketing is the publisher’s job. Promoting my own book shouldn’t be my responsibility.”
Unfortunately–unless you are Stephen King or Malcolm Gladwell–the publisher probably won’t have the budget to market your book. If you don’t promote your book, no one else will.
6. Create a Media Kit
Your media kit should include:
* Professionally printed business cards with the book cover on one side and your contact information on the other side. Do not try to print them on your home printer. This is a time to invest in your product and yourself, not save money.
* A headshot by a professional photographer or a talented amateur. It should be well lit, with a neutral background. Your eyes should sparkle.
* A 100 – 150-word biography. The main purpose of the biography is to tell a reader why you are uniquely qualified to have written this particular book.
* A ‘one-sheet’ for the book: a single piece of paper with a glossy print of the book cover on one side and a one-page description of the book on the other side. Be sure to include a few short blurbs and recommendations from colleagues and friends in the description.
7. Create a Book Pitch
Consider writing at least three sales pitches for your book: 10 seconds, 30 seconds, and 60 seconds. When someone asks what the book is about, give them the 10-second pitch. If the person responds with interest, have a longer pitch ready! Practice your pitches on friends until they tell you the pitches work.
8. Build a Website
As publication day approaches, build a full website. The website should include:
* A book blog, in which you write updates, corrections, errata and respond to reader comments and suggestions. This book blog may become the basis for the second edition of your book.
* Sample chapters from your book
* A link to the Amazon page for your book, so people can buy the book online
* Your media kit (see step 5)
* Book reviews and blurbs.
* Your schedule of appearances, including bookstores, speaking engagements, and conferences
* Contact information.
9. Get Book Reviews from Individuals
Six months (nine if possible) before the book is due to appear in bookstores, start asking people for reviews and blurbs. Send reviewers a printed galley proof of your book. If you don’t yet have printed galley proofs, send a PDF containing the first two chapters, a table of contents and your bio.
Don’t be afraid to approach the ‘biggest names’ in your field. (This is important.) Ask for both reviews and blurbs. Busy people may only have time to write a few sentences. A word about PDFs: check with your publisher about their policies on review copies. Many publishers will NOT allow you to send out a PDF copy of the entire book. They are afraid the book will be stolen.
10. Write Articles
Every field has eZines, websites, and magazines that advocate or deal with the subject of your book. Find them. Once you know where they are, look through them and figure out which ones talk to the audience for your book. Contact those sites or publications and pitch articles that will be of interest to their readers. Schedule articles to appear around the time your book will appear in bookstores and on Amazon. For example, if your book is going to appear in bookstores and on Amazon in mid-June, schedule your articles to appear in July, August, and September. Remember to pitch articles early, because many magazines and eZines have a 3-6 month lead time. Mention your book title somewhere in the article. In online articles, link the book title to its Amazon page so readers can click over and buy the book.
11. Get Book Reviews from eZines and Magazines
Ask websites, eZines and magazines in your field to review your book. Some websites or eZines may offer to trade, to review your book if you write an article for them. For example, earlier this year I contacted Writers Store and offered to write an article about what I learned while promoting my most recent books: Producing With Passion and Digital Video Secrets. This article is the result of that contact.
12. Get 20 Amazon Reviews
Amazon reviews are amazingly effective. Everyone from book buyers to publishers reads them. Your goal is to get at least 20 reviews. Contact everyone you know and ask each of them if they would give your book an honest review. Let them know it can be brief. If they agree, send them either a galley proof, a promotional copy of the book, or a PDF containing a table of contents, two sample chapters, and your bio. Amazon’s Top Customer Reviewers are another source of high-value reviews. Find the reviewers who deal with books in your area. Write to them. Tell them you have written a book they might be interested in, and that you’d appreciate a review. If they respond, send them a galley proof or a promotional copy of your book.
13. Get Mentioned in email Blasts
Look for organizations in your field that send large-volume emails. Try to get your book reviewed in their email or newsletter. When the number of people receiving the emails is 100,000 or more it’s sometimes referred to as an email blast.
14. Speak at Conferences
As a published author, you have the qualifications necessary to speak at conferences. Contact conference organizers at least 6 months in advance. At first, you may have to register and pay a fee to speak. Later, when you become better known, conferences may seek you out, and may even pay you to speak.
You should be prepared to give a 45-minute presentation. A useful way to structure a 45-minute presentation is to speak for 30 minutes, and take questions from the floor for the last 15 minutes. Plan to take a few minutes after your speech to circulate with the audience. Have a table in the back of the room where you or someone on your team sells books.
15. Make and Post Online Videos
Make a few 5 minute videos (or a series of videos) of yourself talking about key issues in your field. Put the book title and URL on the bottom of the video screen and in the credits.
Post your videos on several of the many video sharing sites including sites like blip.tv, jump cut, our media, Vimeo, vSocial and YouTube. Embed the video clips on your website.
Plan on following your promotion plan–perhaps an hour a day–for at least a year. Resolve to do something every day on promotion. Remember – follow-up and persistence are the keys to success.
*****************************
I hope this list has been of help to you. In addition, if you’re a Self-Publisher and you are interested in letting me read a copy of your book in exchange for an honest review, please send me an email and I will give you the details. I will read your book for free and offer my opinion. Why am I doing this? Because as a Self-Publisher I know how tight finances can be and that every little bit helps. I have some time to read and would love to see what you have to offer.
Email: ahouseofpoetry@gmail.com
Guest Feature: How To Clean a Microwave with Vinegar & Steam
Oh my goodness!
Ok, just had to get that out. I found an awesome website called Practically Functional. Here, Jessi gives neat DIY tips on various projects, such as how to better clean stuff. So anyway, I’m doing my usual scroll through the online community and was excited to find something that could help clean microwaves. For those of you who live under a rock, microwaves contain many crevices that require back bending work and are extremely boring to clean. I really hate to have to get down into it but it is a price I am willing to pay for clean. Microwaves to me are like unofficial clean house detectives. You can really tell how clean or unclean someone is just by how the microwave looks (on the inside people) because its one of those attention to detail thingys. If everything sparkles but the microwave looks like a bad science experiment then the person’s not as clean (or thorough) as it appears. That don’t mean yall can go around checking people’s microwaves now that you know the secret. ; )
I would have re-blogged Jessi but I couldn’t find the re-blog button and I’m not sure if there is a re-blog button. So I’ll just post the link here for you to check out. Below is the basic recipe. Yea, you’ve gotta visit the website for the extra stuff:
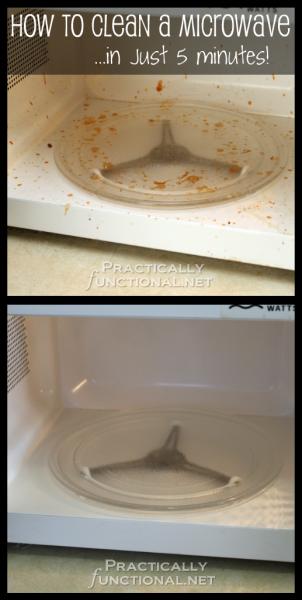
“Have you ever exploded pizza sauce in the microwave? Today’s post will show you how to clean a microwave using only water, vinegar, and steam! It’s easy to do, only takes about five minutes, and it works great! I was able to clean off dirt and grime I didn’t even realize was there! Mostly what I saw when I looked at the microwave were the big red pizza sauce spills, but after I was done cleaning I realized the entire thing had gone five shades whiter! Don’t just assume your microwave is yellow. It’s not; microwaves are white.
How To Clean A Microwave With Vinegar
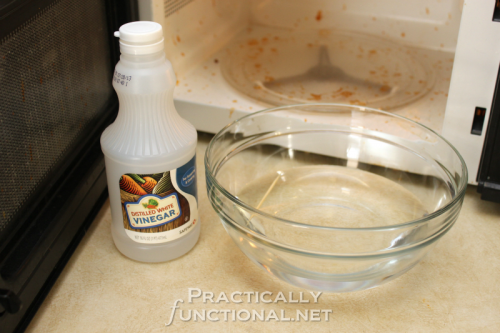
Here’s what you need:
vinegar
water
one drop of Young Living lemon essential oil (optional)
a bowl
a toothpick (optional)
Fill a microwaveable bowl with 1-2 cups of water and add 1-2 tablespoons of vinegar. Add a drop of essential oil if you don’t want your microwave to smell like vinegar.
CAUTION: Liquids can get superheated in a microwave and explode. It isn’t common, but it can happen if you microwave liquids in a perfectly smooth container. Bubbles can’t form on a smooth surface, so the liquid won’t boil until it is jostled. This can cause it to “explode” into boiling when you open the microwave or try to remove the bowl. But don’t freak out! Most consumer bowls and cups are not perfectly smooth, and a microwave with a turntable jostles the liquid enough to allow it to boil. But, if you are worried about it, float a toothpick in your bowl. Bubbles will be able to form on the wood, causing the water to boil without exploding.

Put the bowl in the microwave and shut the door. Microwave the water and vinegar for 5 minutes. If your microwave is REALLY dirty, don’t open the microwave right away when the timer goes off. Leave the door shut for about two more minutes to let the steam continue to work. The steam will help loosen up caked on bits of food, and the vinegar will help eliminate any odors. When you open the door, be careful pulling the bowl out; it will be very hot! Remove the turntable tray (carefully, it will be hot as well) and wash it in the sink. Now just take a cloth or sponge and wipe down the inside of the microwave. The dirt and food will come right off!
If you don’t want to microwave a bowl of water and vinegar, you can also get a sponge soaking wet, pour about a teaspoon of vinegar on it, and then microwave the sponge. This doesn’t create as much steam though, so if your microwave is really dirty like mine was, use the bowl instead.
Read more here: How To Clean A Microwave With Vinegar And Steam! http://www.practicallyfunctional.com/how-to-clean-your-microwave-in-2/
Books Every Woman Should Own
One of the things very few people know about me is that I’m a Certified Medical Assistant with a focus in Phlebotomy. I’ve also been trained by the American Heart Association for Pediatric First Aid, and Adult CPR. No one knows this because I simply don’t talk about it. I don’t offer too much information about myself unless I feel it is warranted. Plus, writing is way better.
Anyway, I can’t remember the last time I was really sick. Whether we’re talking about flu’s, colds, it’s been awhile and it’s been awhile for my husband as well. That’s because if you look around your house, there is probably a cure to almost everything you would normally run to the doctor for. In fact, there’s pretty much nothing you cannot cure with Herbs and a little bit of common sense.
Below are some books I have collected over time that I think every woman, especially every mother, should own:
Herbally Yours by Penny C. Royal:
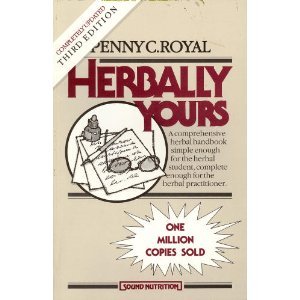
I call this book the “No Strings Attached” Herb book because it is literally a complete list of Herbs and Herbal combinations you could use for a variety of ailments without an agenda. With the exception of the introduction (which I opt to just skip), it is an alphabetized list of natural herbs to help with anything from High Blood Pressure to Infertility. It is also easy to follow. You can probably find it for real cheap on Amazon. My mother’s name is also Penney so it’s possible I’m just being biased :).
Home Remedies Health Handbook by John H. Renner, M.D., and the Consumer Health Information Institute:
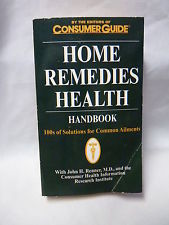
This book is a great compliment to Herbally Yours. If you buy Herbally Yours you have to buy this one too. That’s because while Herbally Yours gives you the list of Herbs to use, this one actually shows you how to use it! It’s got a lot of cool tips and gives you practical knowledge on how to care for over eighty common health problems. From constipation to tooth aches, the common cold and even diaper rashes, this book’s got you covered.
Natural Cures and Gentle Medicines by the editors of FC&A
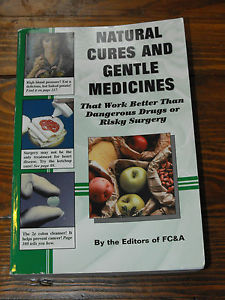
This book is great on information about diseases and common aches and pains. It has information on Alzheimer’s disease, Asthma, and even exercises to escape back pain. And get this: there’s even something in here on hiccups! That’s right, there are things you can do to stop hiccups. One exercise I do that works for me is that when I feel a Hiccup coming on I hold my breath. I know I know you’ve heard this before. But the trick to it is being able to hold your breath long enough. Hiccups occur when a ripple contracts the diaphragm, a large sheet of muscle that separates the chest cavity from the abdominal cavity. This spasm causes an intake of breath that is suddenly stopped by the closure of the vocal cords. This closure causes the “hiccup” sound because there is a blockage of air. That’s why while hiccups happen out the blue; most people get them (myself included) when they eat too quickly. But if you relax, breath in, and hold your breath for a few seconds it’ll help stop the hiccups. This isn’t in the book this is just what I’ve found works best for me personally. You can actually feel the food going down too if you do it right and the hiccup goes away.
Now, there’s one book I do have, but that I do not want to recommend. The only reason I have it is because we’ve had it for awhile. To each it’s own so if you feel like confusing yourself you can go ahead and Google it. Llaila O Afrika’s African Holistic Health. It has some interesting health information in it, however he mixes too much of his own doctrine in with the information. I don’t like when people take stuff too far, you have to maintain a proper balance in your life. It’s one thing to want to learn more about your health as it relates to your cultural and ethnic background, but when you start assuming that everything black is good and white is bad that crosses the line. That doesn’t even make any sense. If you’re going to give information about how unhealthy white bread is do that. But don’t just say that it’s unhealthy because it’s white. Denote the unhealthy aspects of this food to what actually makes it unhealthy. Tell me that white bread is made from refined white flour containing several unwholesome constituents; tell me that though it’s produced from the whole wheat grain it is then subjected to the refining process which removes all traces of the husk, or bran and along with it all the goodness contained in the grain. But also tell me that it is not that which goes into the body that defiles the man but what comes out and that there are still some good aspects of the white bread. This is called balance. Don’t take it too far and don’t take it too lightly. To put it mildly, the books A-Z Herbs for Diseases and explanations on what causes them is good information, but too much of the book is filled with his own philosophy and that’s a dangerous combination in the research department. There are actually right and wrong ways to research and those who are not careful can easily get themselves highly confused. For example, in section 16: Holistic Perspectives the man said:
“Kissing is a European sexual and friendship custom…African men kiss each other and African women kiss each other because kissing is a spiritual custom. Caucasian kissing between men and women is primarily sexual.”
What?
Where are you getting this information from? This is what I’m talking about. You can’t go around just making up stuff. In the end I get the feeling I’m being indoctrinated into some Afrocentric Egyptology instead of learning about health which can lead astray those not rooted in the truth and is in turn counterproductive to the purpose of picking up the book in the first place.
All Natural Shea Butter Shampoo
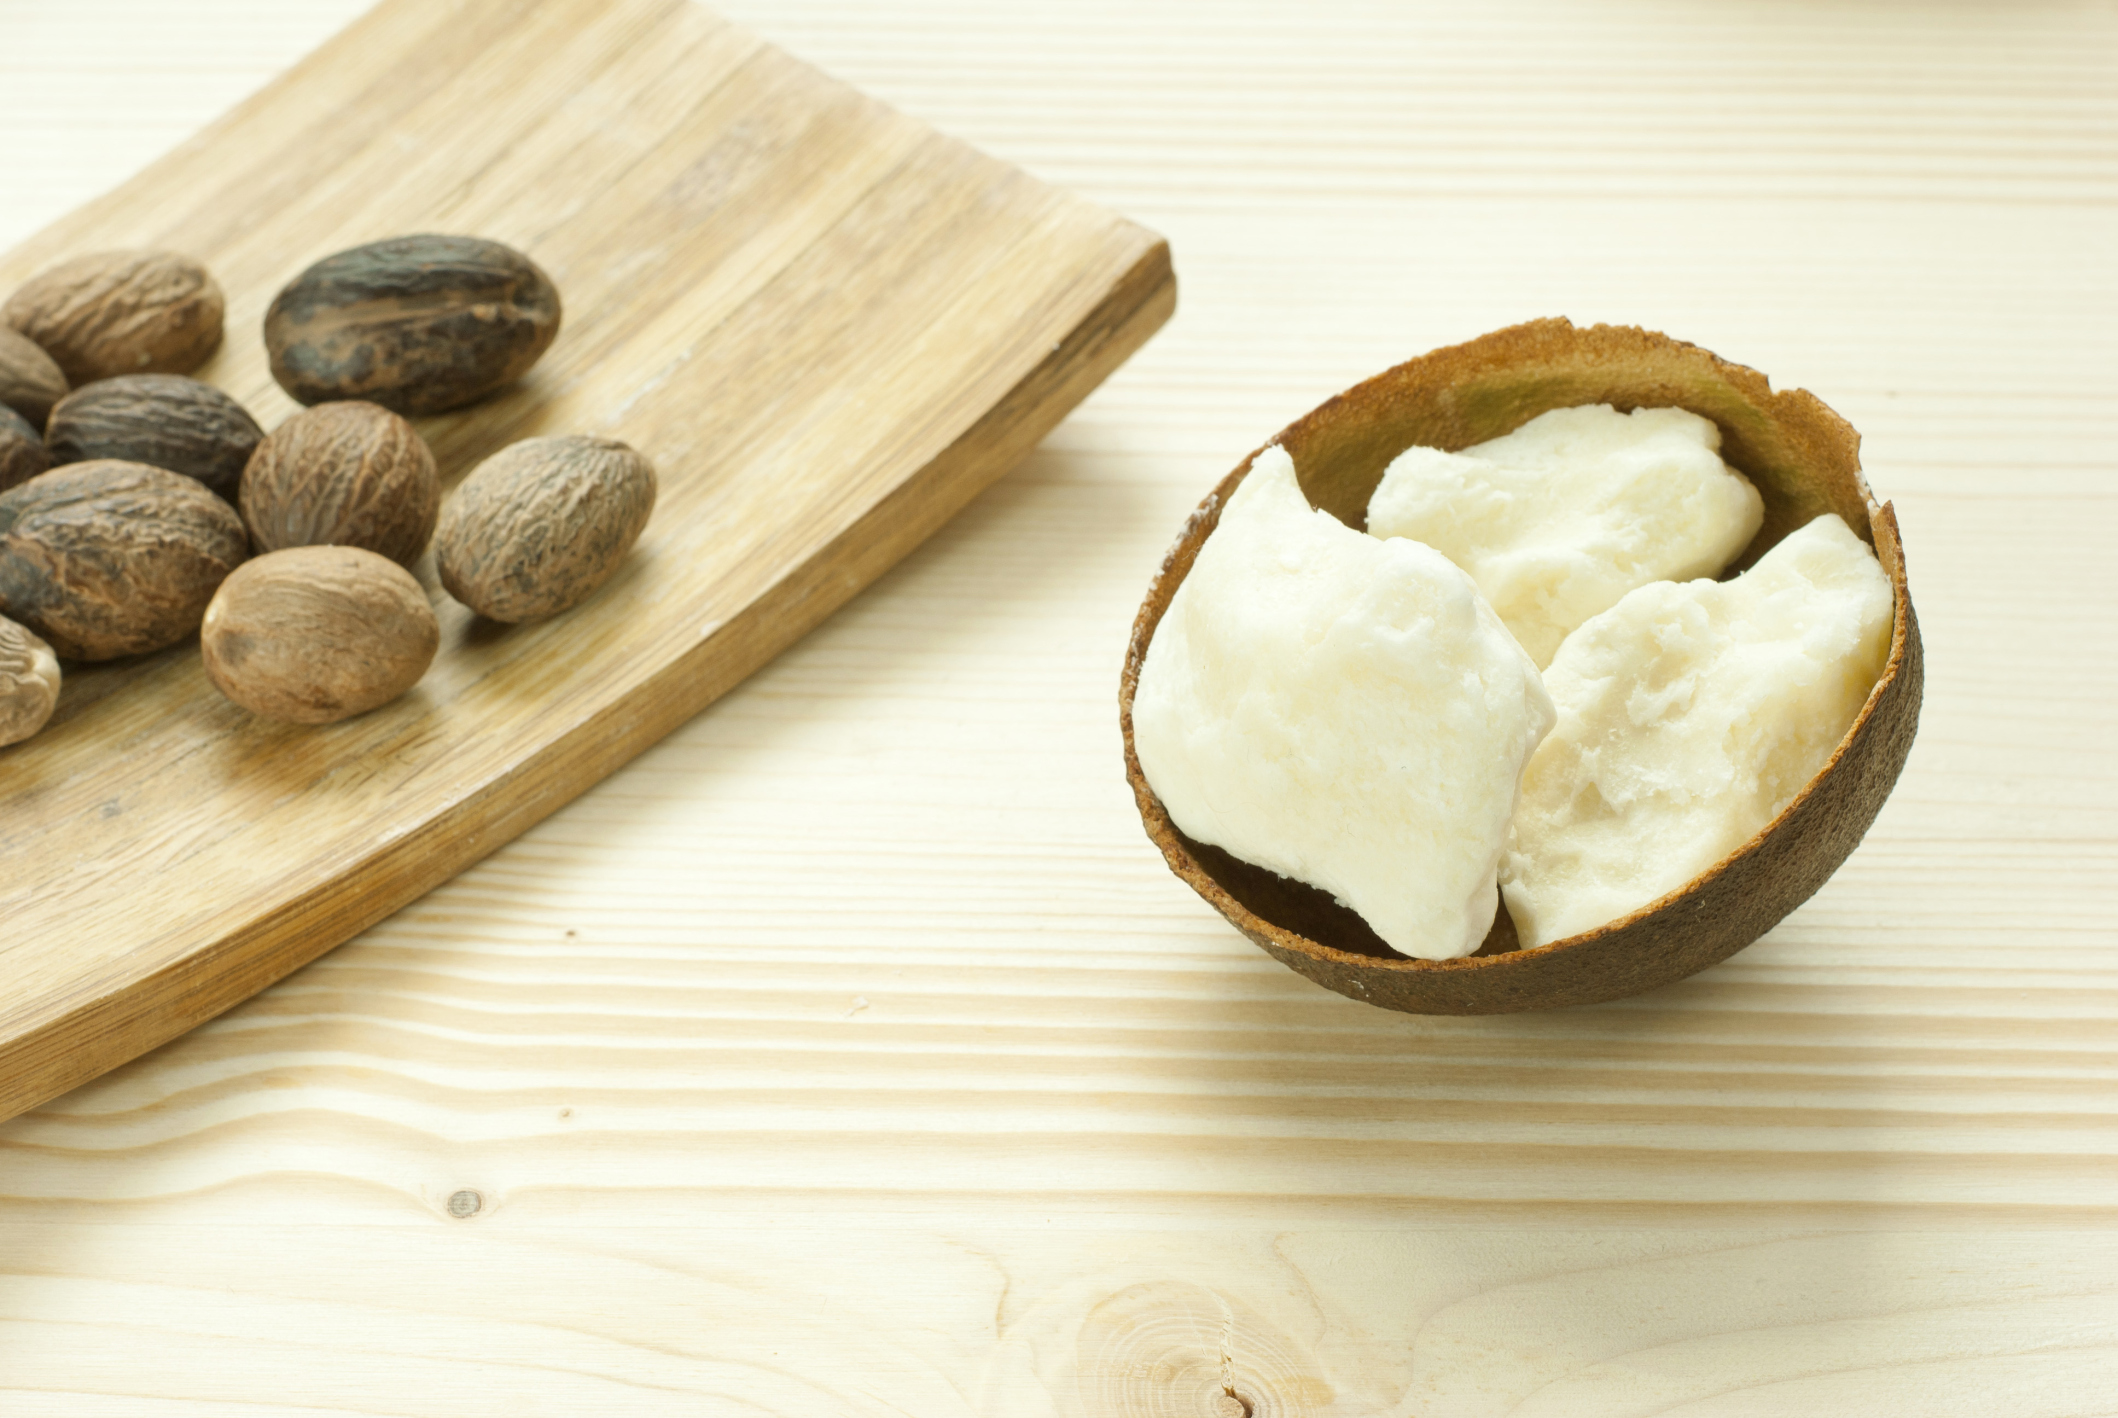
Yes, with a little effort you can make your very own version of Shea Butter Shampoo. Shea Butter is a natural conditioner for hair. Produced from the Shea-Karite nut tree in West and East Africa; it is a triglyceride derived mainly from stearic acid and oleic acid. It is widely used in cosmetics as a moisturizer, salve or lotion . It helps to soothe dry, itchy scalp, dandruff, locks moisture in, and protects against heat.

I actually included Black Soap in my version of this ingredient but I decided to leave it out of this one for a number of reasons. Firstly, I did not like the result of how the soap felt in my hair when I got down to actually using the shampoo. Black Soap is a concentrated soap that must be diluted with oils and butter (like Shea Butter) in order to achieve the desired effect. For some it works, but for others it leaves the hair tangled, greasy, and dry. It can also make the scalp tingle because of its concentrated properties. It is, Black Soap, a very good product for hair and skin. It is good for rashes or any skin problem but personally I would like to become better informed on how to use it as a shampoo before giving information about it. For this reason, though I used it in my version, I will leave it out of this one. But, if you would like to add African Black Soap to this version there are plenty of YouTube videos available online on how to use it as a shampoo.
For this Sunday’s Recipe you will need:
Shea Butter
Aloe Vera Gel
Coconut Oil
Rosemary
Small Jar
A dark tinted bottle with a lid
Empty Shampoo Bottle
Knife
1. Melt your Shea butter: Place a couple pieces of aluminum foil on a skillet you don’t expect to really cook in again. Set stove to low heat. Place Shea Butter on foil and let it melt. (This is preferred over using the microwave). Watch it carefully; it only takes a few minutes to melt. You can also melt the coconut oil the same way if it is hardened
(Coconut oil becomes a solid above 76 F. But you can let it melt naturally just by leaving it out a day before you begin production since it’ll melt once it’s below that threshold).
3. Pour liquid Shea Butter and Coconut Oil in a bowl.
Rosemary:

I chose to incorporate Rosemary a). because there’s a ton of it growing on the side of my house, and b). because it has been in use as an effective solution to hair loss for centuries now. It also helps in reducing hair thinning and balding. It will help in improving the circulation of the scalp and this will in turn help in hair growth. Rosemary works effectively on the hair when combined with olive oil (I also used mint).
4. So next, you want to extract the oils from your herbs which means you want to start this process a couple days before you plan to make the shampoo. Of course you can just buy the essential oils you want to add but why take the fun out of it? :
a). Cut up the Rosemary leaf. Then fill a small jar about half-way with the herb depending on how much of it you want to use in your shampoo.

b). Cover the cut herb with olive oil. Make sure that all of the herbs are covered. How much oil this will require depends on the size and shape of your jar.
c). Put the lid on the jar and shake it gently to mix the herbs and oils. Place the jar in a sunny spot and leave it for at least 48 hours. Swirl the ingredients around gently every few hours.

d). Pour the essential oil into a dark-tinted bottle with a good stopper. Label the jar with the ingredients and the date because essential oils lose their potency after six months.
5. Now, add this oil to your mix, not all of it, just enough to use for this batch. Also add the Aloe Vera Gel to your mixture. Aloe Vera’s natural enzymes destroy the excessive dead skin cells and fungus that leads to dandruff. While also leaving the scalps ph levels balanced and moisturized.
Mix everything together with an electric mixer, or blend it in a blender you use specifically for this purpose (obviously not the same one you make your smoothies with 🙂 ).
Pour into your old shampoo bottle and enjoy. (Note: This is an old Shampoo bottle with my Shea Butter Shampoo in it).
Bisquick Chicken Pot Pie

For today’s recipe Sunday, we’re making Chicken Pot Pie! It’s one of my favorite dishes and so easy to make. You won’t get my exact recipe, but here’s the next best thing.
You’ll need:
• Chicken (obviously right). Get the Chicken breast or boneless so it’s easier to cut into pieces.
• Bisquick Pancake Mix
• Frozen Vegetables (or raw vegetables for you fancy chefs out there)
• 1 Egg (more if you’re making a large portion)
• Milk
Preheat oven to 400°F.
First, cook the chicken fully and slice it up into tiny chicken pieces.

Mix chicken pieces, veggies and cream of chicken soup together and spread into bottom of greased pie pan or pan of choice (it tastes better if you use melted butter as a lubricant instead of regular spray oil). Also, when I’m making a large portion, I like to use a roasting pan in replace of a pie pan.
Mix remaining ingredients (Bisquick, milk and egg) and pour on top of chicken mixture.
Bake in oven for 30 minutes or until top turns golden brown.
Enjoy!
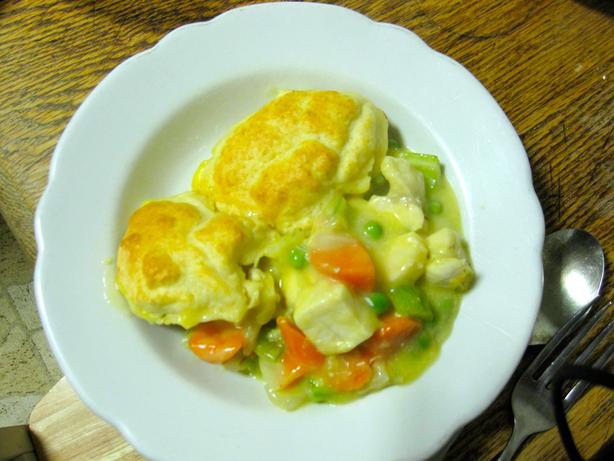
*Note: The pictures used in this post are not mine. I did not have time to take pictures of the one I made but these use the same ingredients and look just as good! 🙂
DIY: Crisco and Butter Candles
It’s Sunday again and that means another exciting recipe here on The PBS Blog. We’re gonna switch it up a bit for you today though. Instead of cooking up a delicious treat, we’re going to take a look at two ways you can keep your light shinning in the event of an emergency.
How to Make a Candle using Crisco
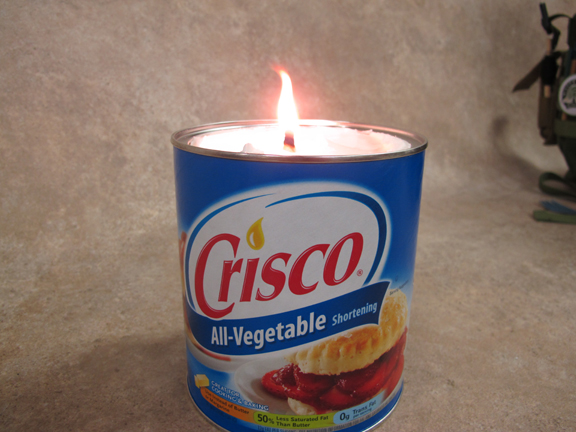
Did you know that the Crisco Company used to be a candle company? Which means you can use Crisco to make candles.
You will need:
• Any sized tub of Crisco Vegetable Oil (I recommend the large 48 oz tub)
• Candle Wick (10 inches for a 48 oz tub)
• Stick
• Lighter
Take your stick and pierce a hole in the middle of the Crisco all the way down.
Next, take the Wick and use the stick to help stick it down to the bottom of the can. Hold the wick with one hand, and use the stick to work it down the hole with the other hand.
And finally, light the candle.
Yup, it’s that easy. But before we move on, let us establish some safety rules:
If you Google or YouTube Crisco Candle you will get loads of information about it since everybody and everybody’s mothers pretty much know about this by now. But one of the primary pieces of information you will also find in addition to how to make the candle itself is that this candle will burn for 45 days. Stop Here.
First of all, I’ve never tried to burn it for that long, nor will I attempt to, and nor should you try to either (didn’t ya mama ever teach you not to believe everything on the internet? lol, joke) but seriously, here’s why:
The Crisco Candle is an Emergency Candle for a reason. It is not designed to be a long term source of light, but it could help in emergency situations. The Crisco container is a foil-lined cardboard tube which can definitely catch fire once the melted oil makes its way down into the paper. In the event you must use this option, it’s a good idea to scoop some of the Crisco into a more stable container that has less of a chance of burning through.
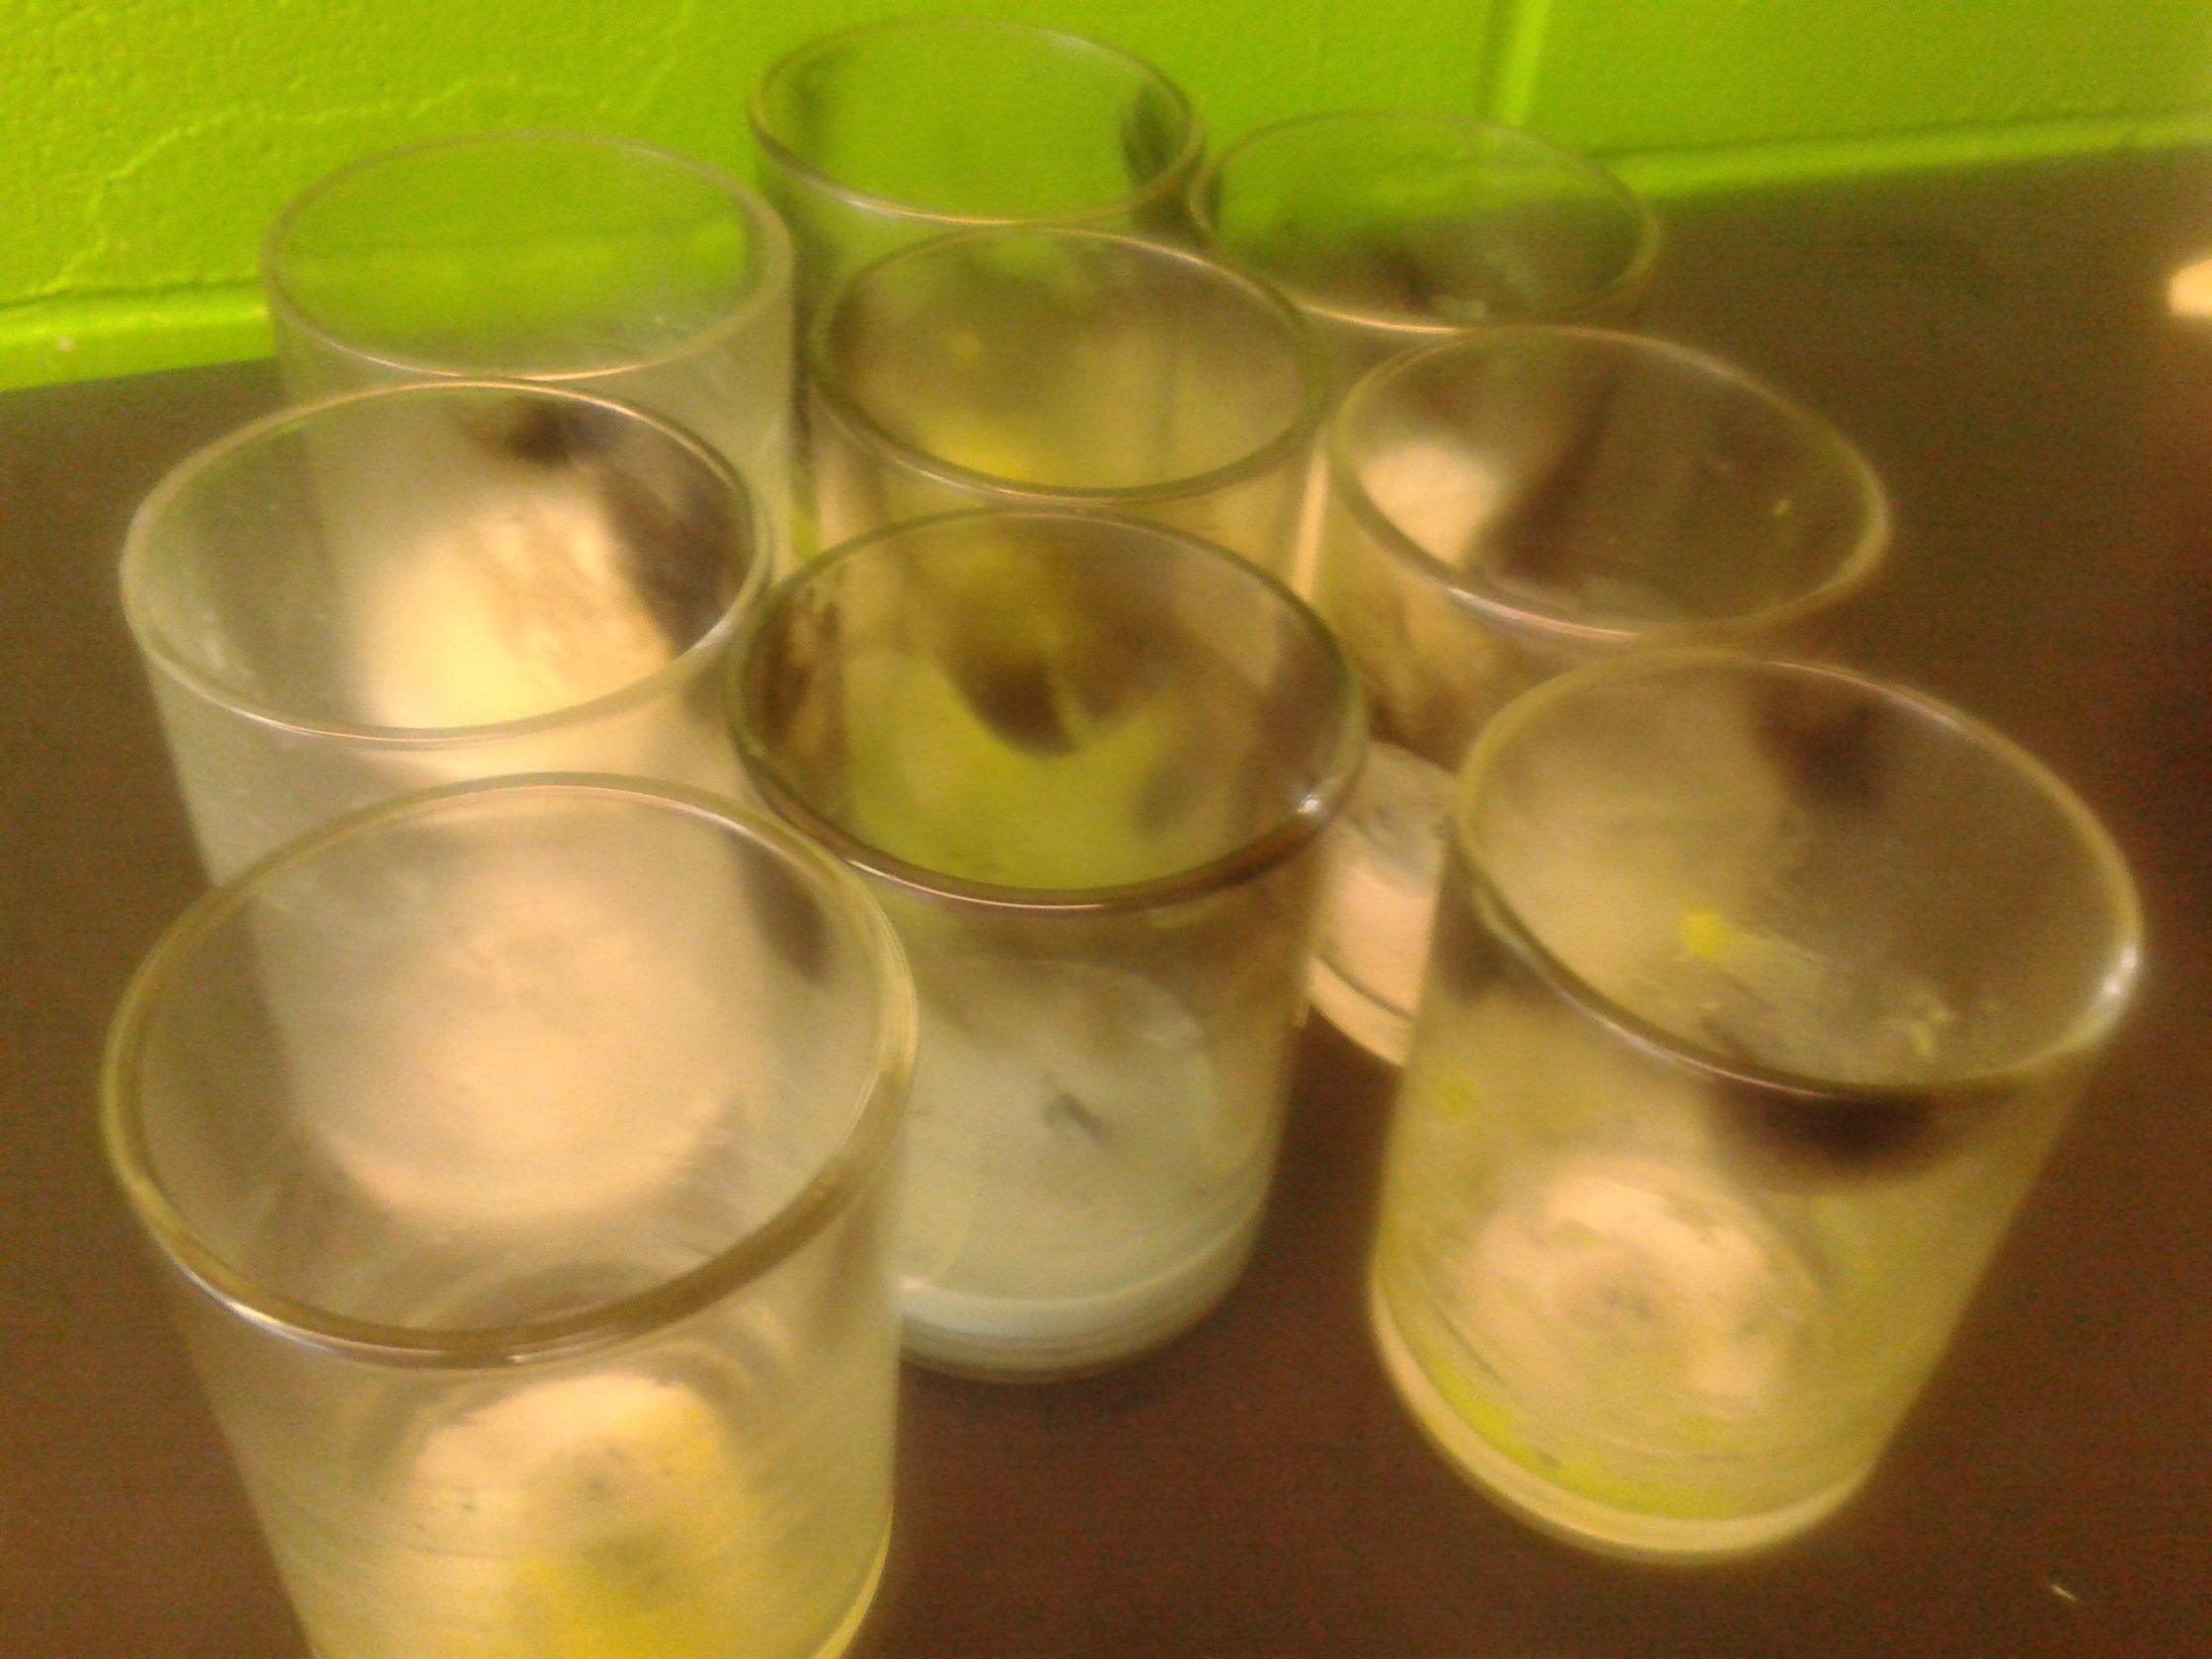
As seen in the picture, I collect Candle glasses after the wax has burned down specifically for this purpose—so I can use it in the event I must make my own candle. The Crisco Candle is a great creative source of light for an emergency, but it is not something you leave burning for an extended period of time or that you walk away from.
Butter Candle
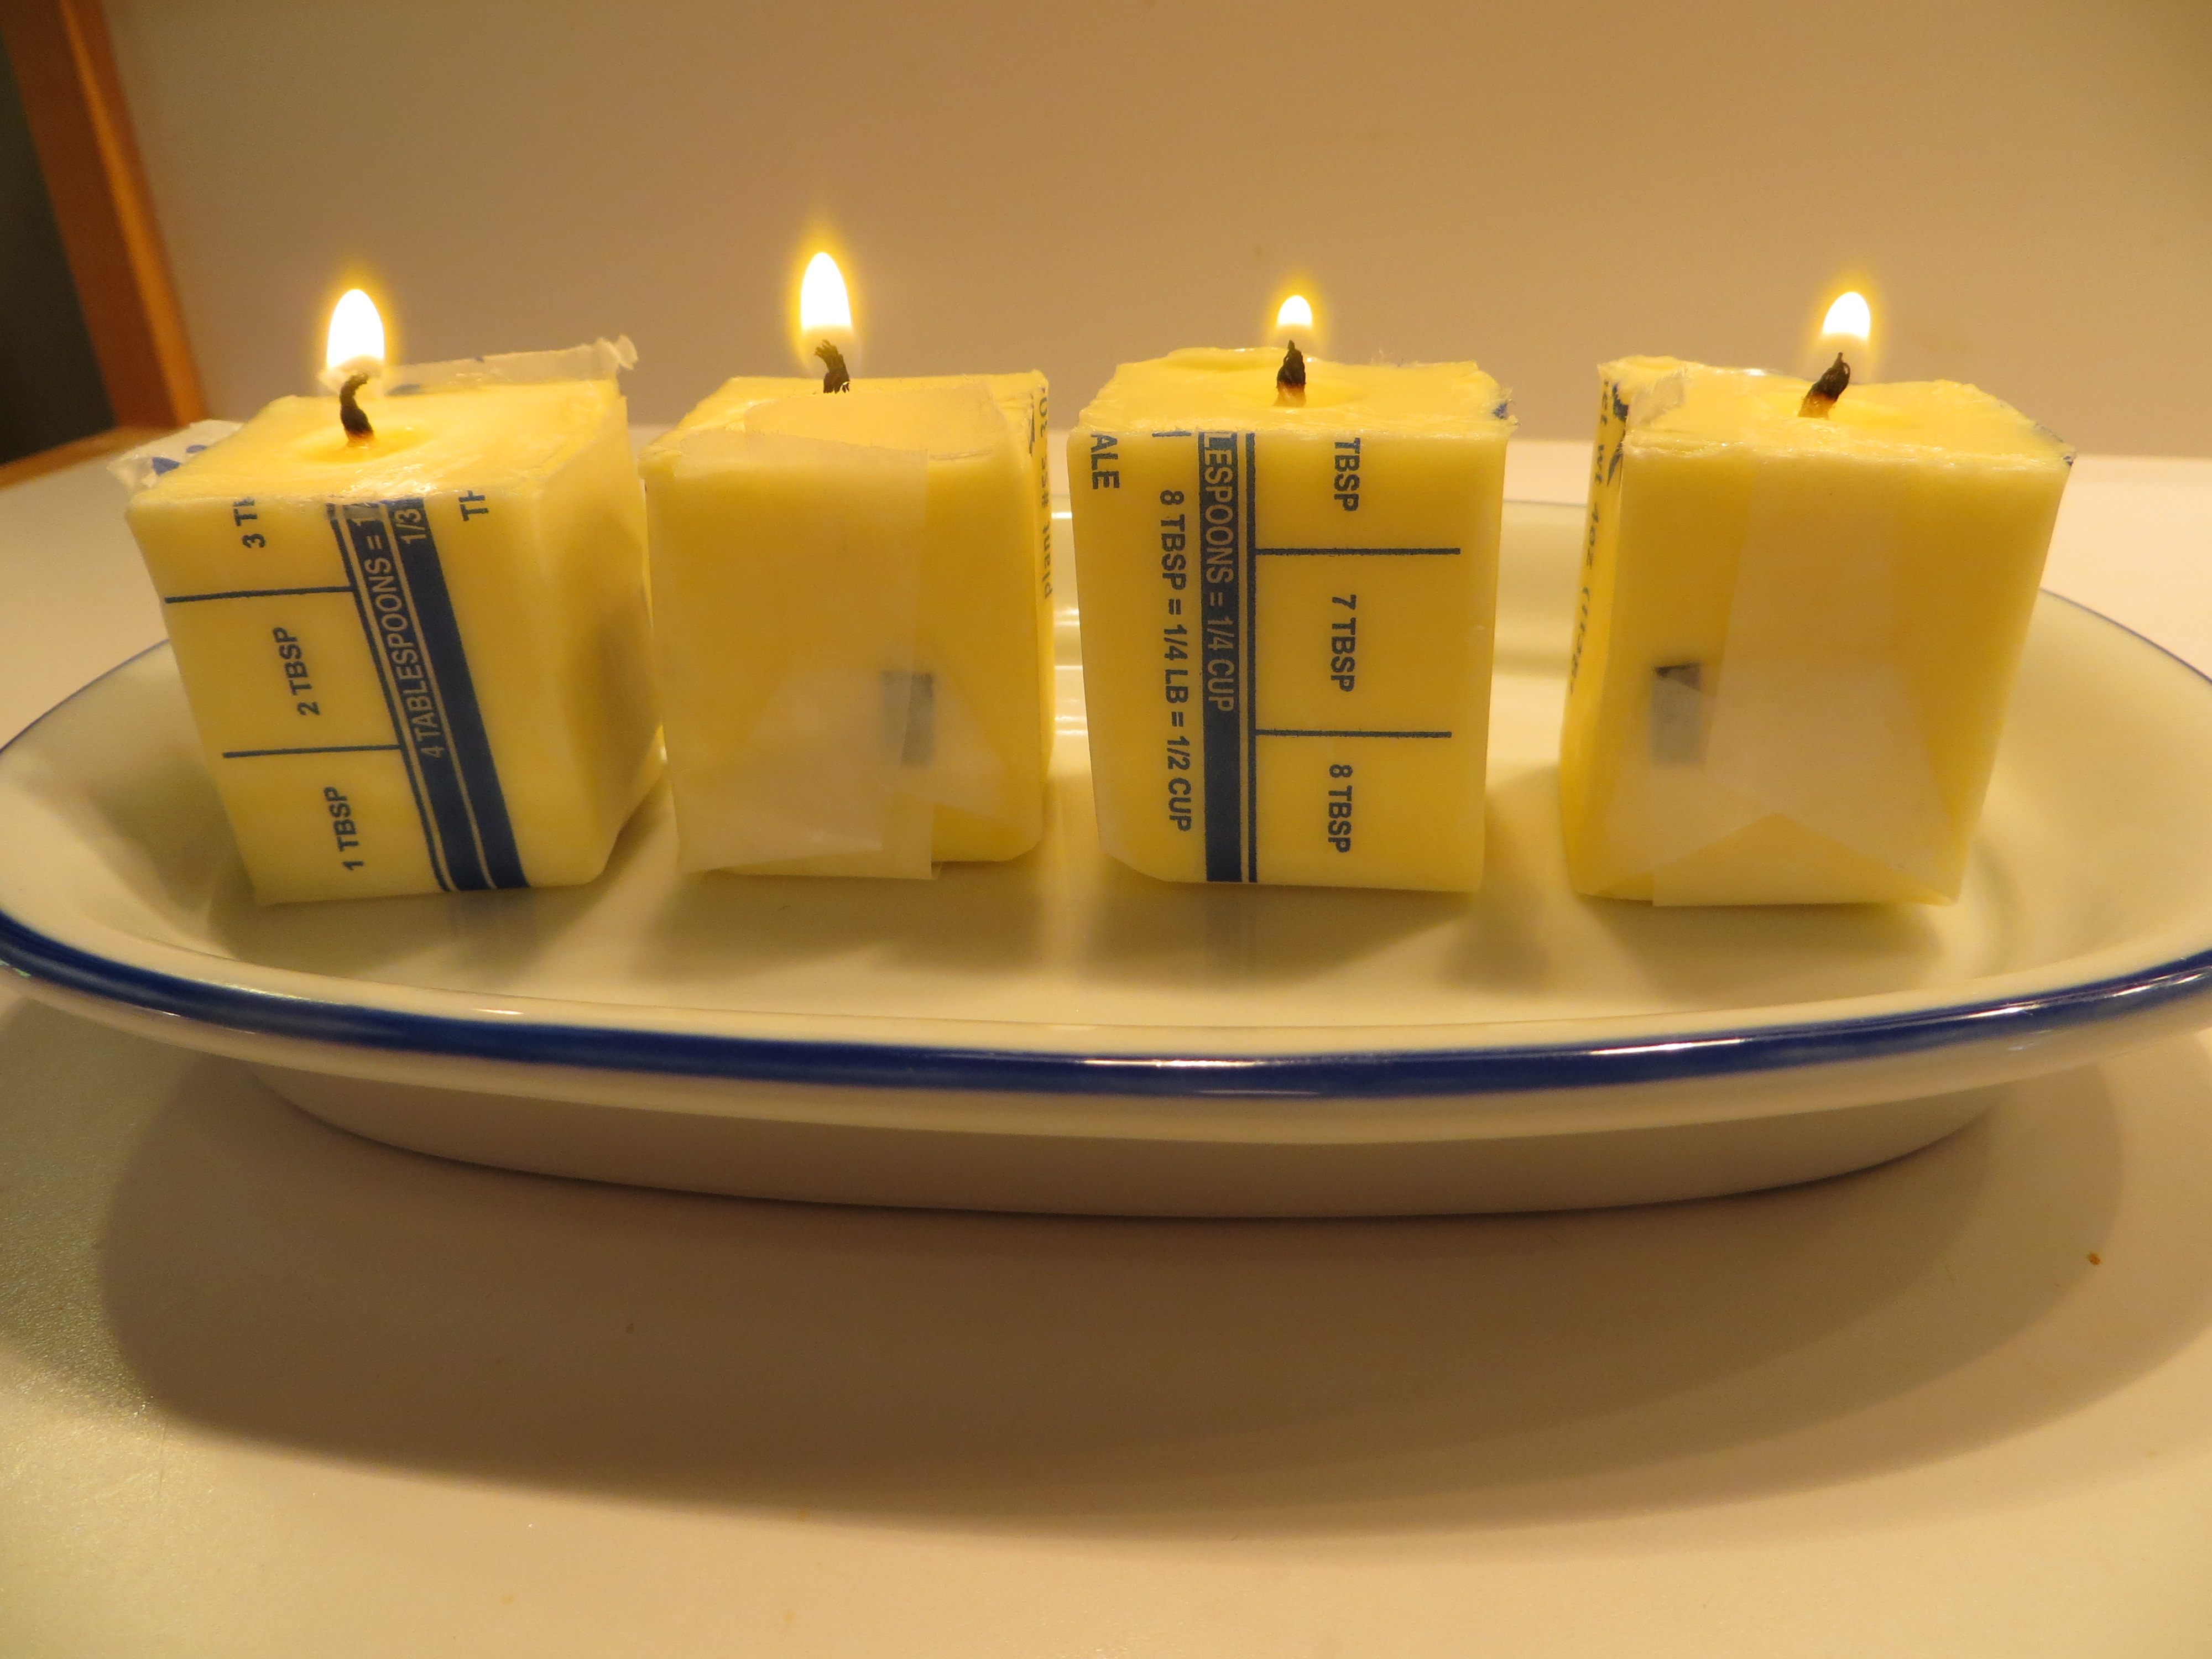
This one comes with the same Caution label as the Crisco because of the paper wrapping, but we’ll get to that later.
You’ll need:
• 1 Stick of Butter
• Knife
• Toilet Paper
• Toothpick
• Lighter
Take the stick of butter and slice it in half, that’s right, right down the middle (horizontally of course….please don’t slice the butter down the middle from the top, vertically in other words. It will be no good).
Next, with the toothpick, make your hole in the middle by sticking it down in the middle; this is where your “wick” will go.
Now, you can buy extra wicks for emergencies, but if not, you can make your own. Tear a nice piece of toilet paper, and roll the toilet paper into a tight roll like your rolling a blunt (don’t lick it though).
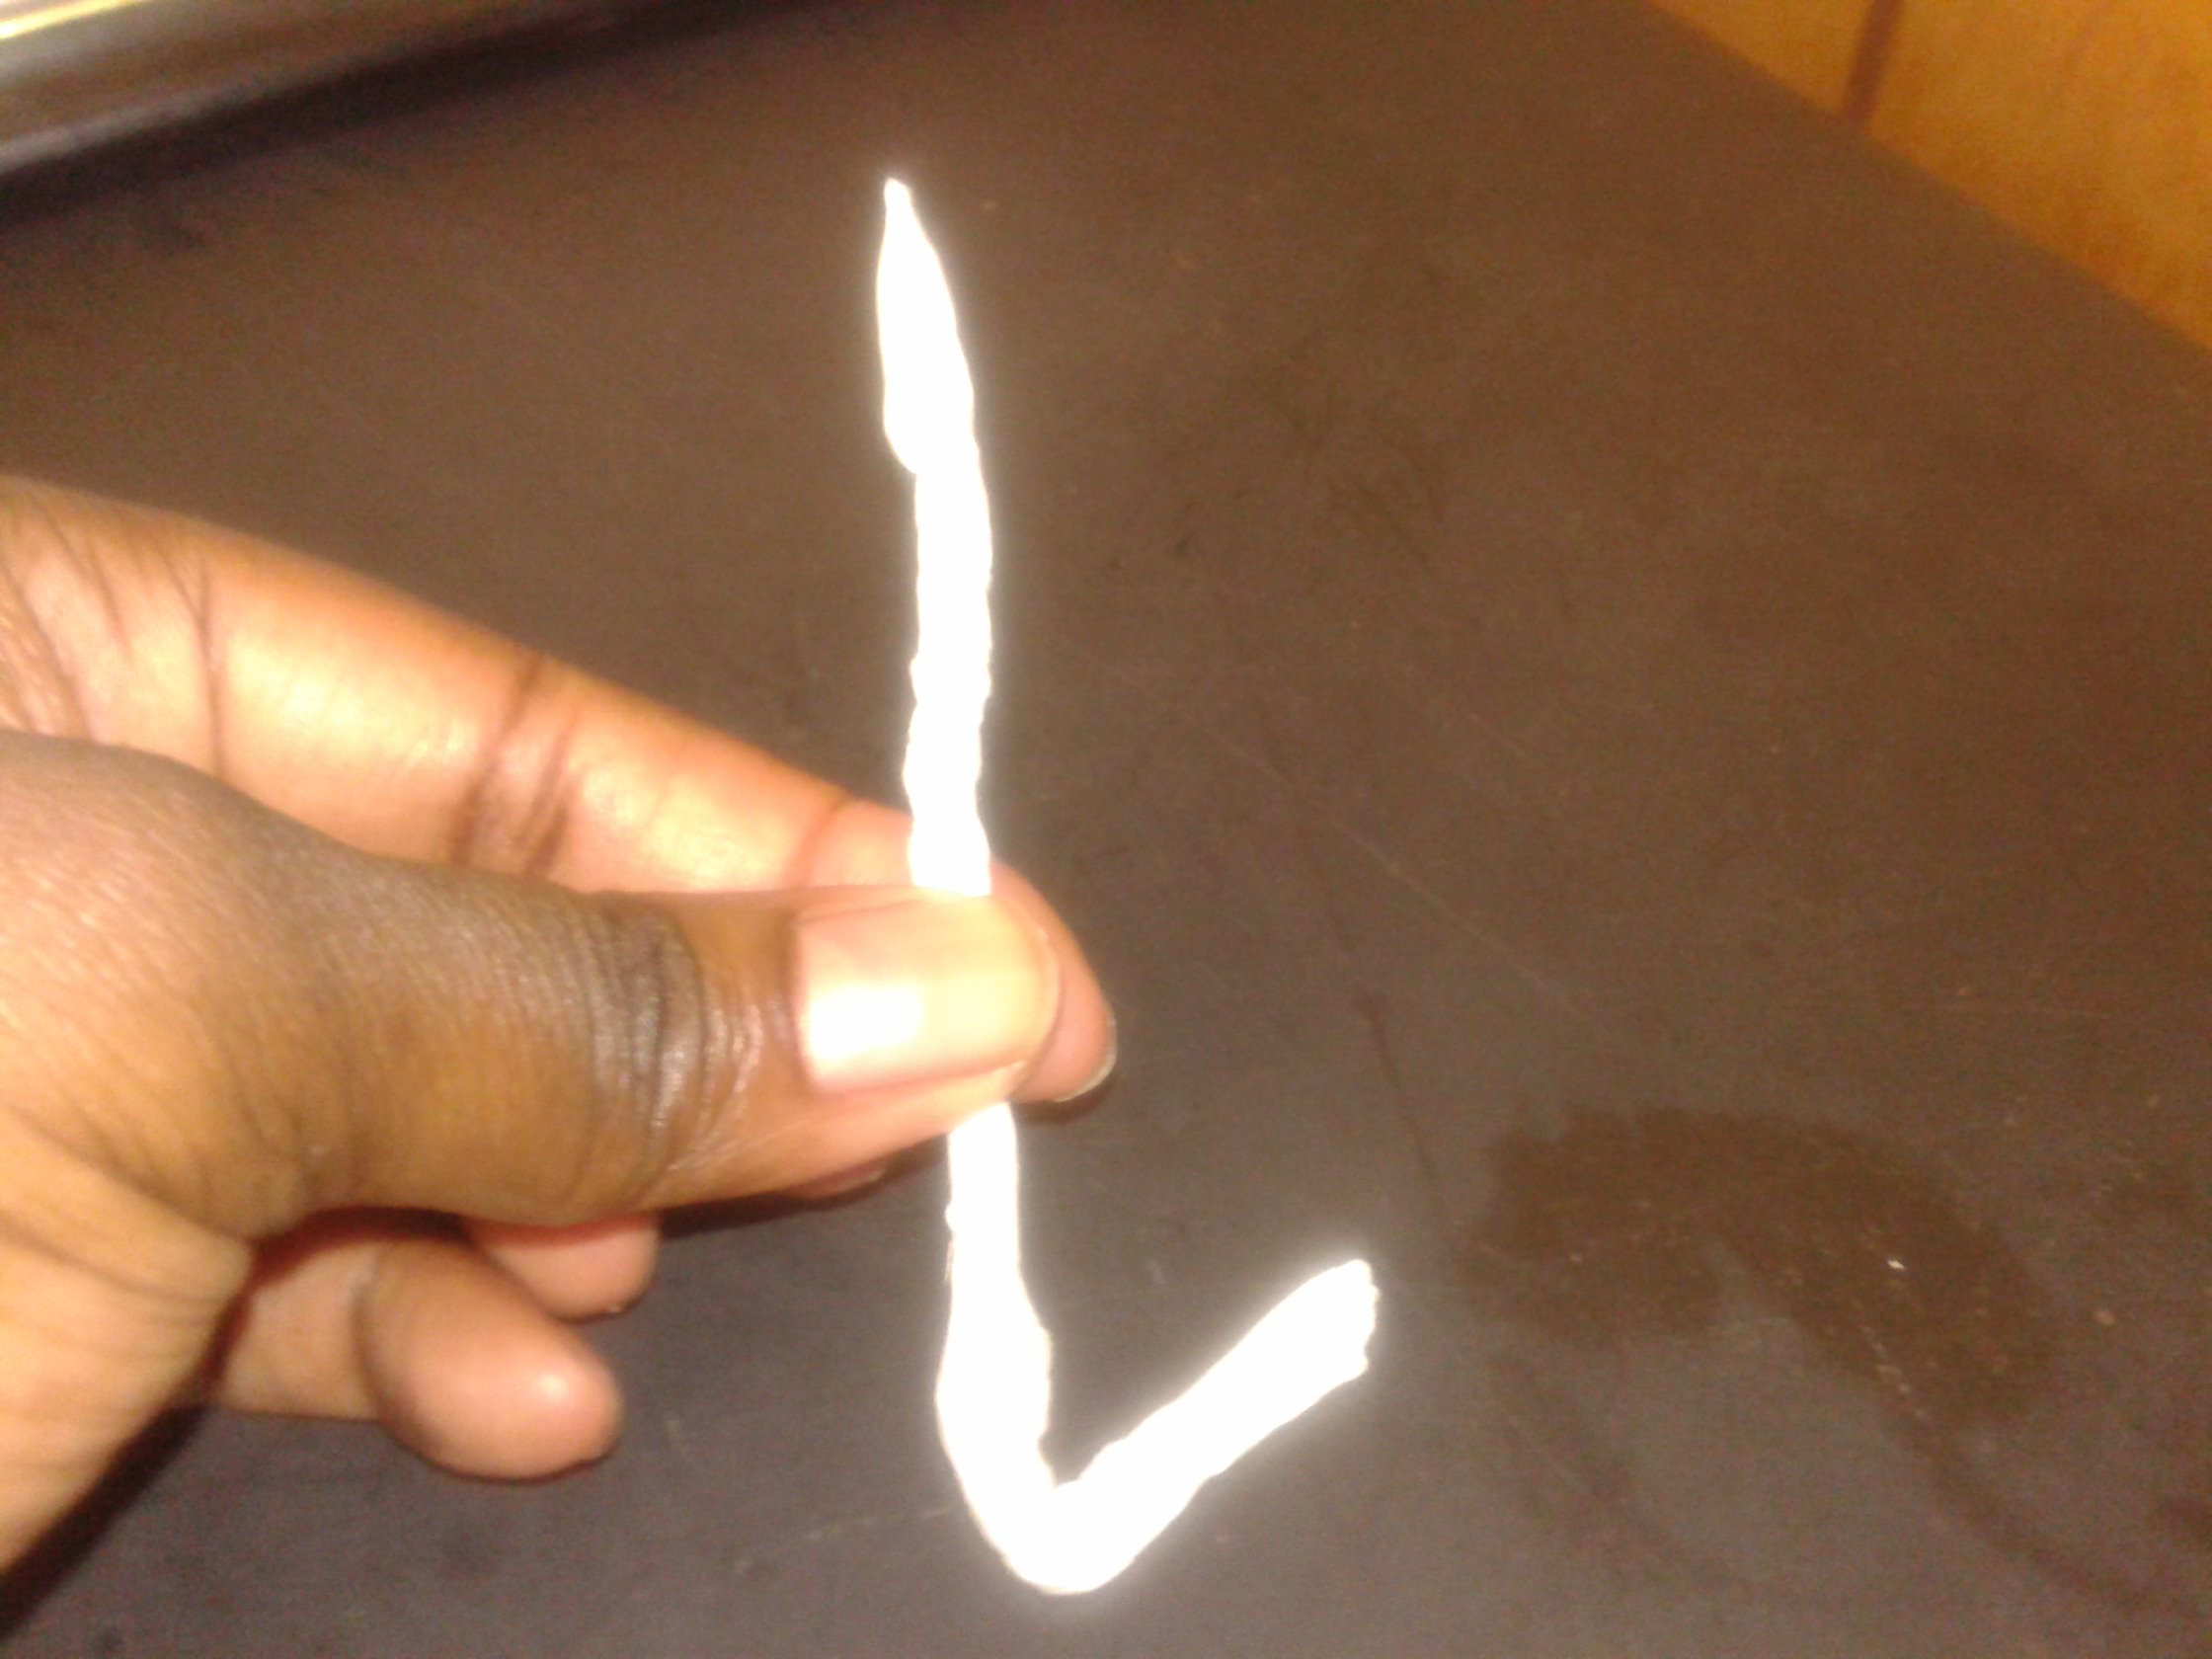
Now, twist the rolled toilet paper so that it’s nice and tight, and bend it at the end as seen in the picture.
Using the toothpick, stick your toilet paper wick into the butter (the bended end will make it easier to stick it down). Make sure to rub the top of your toilet wick around a bit in the butter before lighting it.
Light it and there you have it, a butter candle!
Now, this is an emergency tip. Like the Crisco, it is not designed to last for long periods of time without taking extra precautions. Instead of having it just in the butter like on these pictures, you can just take some butter and put it into a better container to ensure a longer burn.
Every Tablespoon of butter burns for approximately 1 hour. That means one stick of butter will give you 8 hours of emergency light. Use your time wisely.
 WARNING: This post is not from a professional perspective and is not a recommendation from any Fire Department or Medical Professional. Candles should be handled by an adult mature enough to take the precautions necessary to handle fire.
