Leftover Delights: Maintaining the same good taste in left-over food

06e6fe42d5f0a6ed5a7e60a44a661a08ecefe0d7a570a468b26dfb5e398c5320

Today’s Recipe Sunday, since it’s been awhile since we’ve last had one, is all about leftovers. Since studies show that most Americans throw away too much food anyway, it is easy to see that they also cook too much food. And alas we have the invention of leftovers, when you can have the same great meal today that you had yesterday. The exact same meal. We’ve all had them. Some of us love them and some of us hate them. But leftovers do come in handy, especially for extremely busy days. The problem however, is that not all food taste good the second (or third) time around. For this reason, some have opted out of the LO and just decide to throw away all the extras. But, why waste all that food? Here’s the truth: Not everyone knows how to store and reheat leftovers. Here are some tips on how to ensure your meal stays delicious days after you’ve cooked it in a segment I like to call: Leftover Delights.

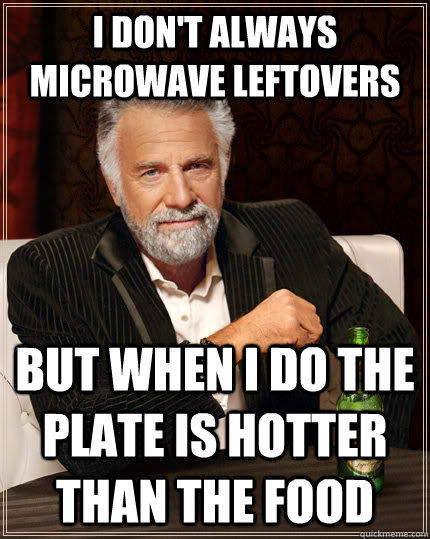
Stay Away from the Microwave

article-2260448-0646BB7E000005DC-618_634x407

We all use the microwave, or at least I do. But when it comes to reheating last night’s dinner, stay away from it. The microwave is going to dry the food out and rob it of its nutrients and natural flavors. A microwaved bowl of chili will not taste the same as a stove top heated bowl. When you re-heat food over the stove or in the oven, it’s the same way you cooked it in the first place and has a tendency to maintain the same flavors. Take French fries for example: Fries is just about the only food that cannot be eaten the next day, or can it? A brother once told me of something I couldn’t believe. But it made so much sense that I wondered why I hadn’t thought of it myself: To re-heat French fries, re-fry them on the stove for no longer than a minute or two. They will taste almost the same as when you had them the night before. I say almost because fries are nearly impossible to re-do, but if you had to, use this method.

And for every other food you wish to have again, just use the stove. We didn’t have a microwave when I grew up so all our leftovers were through the stove. And as children, we barely knew the difference. I just reheated some Asian rice a few days ago as a matter of fact (it was super bomb) on top of the stove instead of the microwave and it was just as delicious as the first time.

Note: If you work in an office, chances are you’ll just have the microwave. To make it taste better, add a little water and stir throughout since microwaved foods tend to get hard on the sides but still be cold in the middle.

Storage

leftovers-ck-0505-article-x

The way food is stored also play a role in how they will taste the next day. Many of us just throw them in a couple of bowls or stick entire pots and pans in the refrigerator and be done with it. But here’s a better way:

• Make sure all food is stored in some kind of a container before putting in the refrigerator. If you can help it, try not to store away the whole pot, this affects the taste of the food.

• Aluminum Foil is widely used to cover food. That’s because it’s good for wrapping and helps food to maintain moisture. But you shouldn’t use foil to cover all kinds of foods. Foods that are high in acid, such as fruits, cabbage or tomatoes, should not be covered with foil because the aluminum can affect the taste of the food.

FYI: How should fruits be wrapped before refrigeration?

0913HomemadeFruitRollups001post

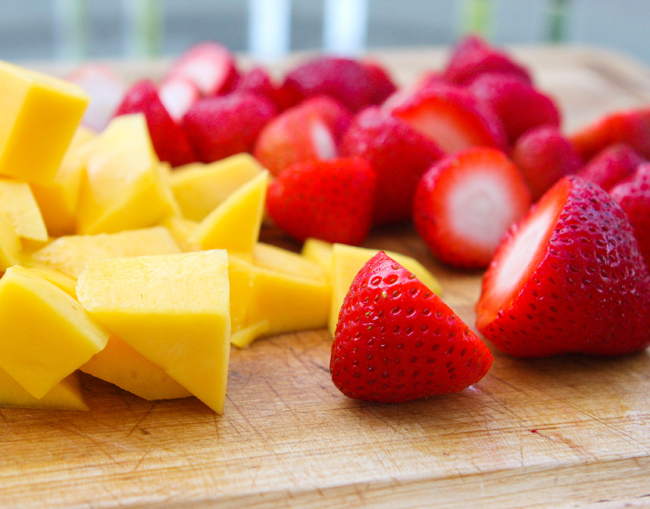
• Mold requires oxygen to grow, so air-tight packaging prevents that.

• Fresh-cut fruits should either have the cut surface covered in an airtight manner (with plastic film) or be placed cut surface down in a plastic container or on a plate. This prevents dehydration (melons), discoloration (apples and peaches), mold growth (most fruits), and vitamin loss. (Source: Ethel Tiersky, Susan Brewer, Ph.D., University of Illinois, Dept. of Food Science and Human Nutrition, Virginia Cooperative Extension “Food Storage Guidelines for Consumers”)

Tip: Start paying attention to how fruits and vegetables are stored at the grocery stores for a better idea of how to store them at home.

Timing

article_img_storing_leftovers

OK, everybody hold their breaths. I am sorry to report to you super leftover fans the following fact:

You can only reheat food once.

Earlier, we spoke about reheating food on the stove to maintain a better taste. After all, the whole purpose of having the same meal is to get the same taste. You may have needed to, but wouldn’t you also want it to taste just as good tonight as it did last night? So yes, reheat over the stove, but you can technically only reheat food once. The more times food is cooled and reheated the greater the potential for food poisoning as bacteria may multiply because the food is cooled too slowly, and might survive because the food isn’t reheated properly. It is a good idea not to eat leftovers after 2 days.

When you do reheat, make sure that food is reheated thoroughly so it is steaming hot all the way through. If you must use a microwave, stop to stir occasionally.

Note:  Since I just had leftover rice I should also say: Leftover cooked rice is fine to eat as long as it gets cooled and refrigerated quickly after cooking and eaten within 24 hours. This is because rice can contain a tough type of bacteria that can survive heating. Most other leftovers are safe to eat up to two days after cooking. Always reheat leftovers until steaming hot.

Serve Immediately

leftover-turkey-soup_istockphoto-ftr

When serving leftovers, make sure you are getting ready to eat immediately after reheating because the temperature can drop and bacteria could grow. It also tastes wayyy better this way.

The basic key to good leftovers is to remember that reheating means to re-cook, not just to warm up. This alone is what makes the difference between good foods the second time around, or stale food. Don’t just warm up tonight’s dinner, but re-cook it.

Health Tip: When washing your hands, always make sure to dry them. Evidence has shown that bacteria spreads more in the presence of moisture, so always dry your hands after washing them thoroughly.

Recipe Sunday – Potato and Beef Pie

RS

Its been a minute since we’ve had a Recipe Sunday. For those of you new to the PBS place to be, Recipe Sunday is when I share a fun recipe with you on you guessed it…Sundays. Not just any recipe, but recipes that are specifically designed to be simple for those who are not experts in the kitchen. Cooking is an area I’m not very excited about but I love getting creative and that means recipes. They put me in a cooking mood and give me the motivation I need to get going. After all, I do have a family to feed. Meal preparation is not just important, it is one of the skills I don’t think is taught enough these days.

So anyway, last week I was searching around the house for something to cook. But I was in the mood for something creative. I decided to take regular household foods we often always have in bulk, and try to see what I could do with them. This is good practice for lean days. If for whatever reason a catastrophe ensues, are you capable of creating a meal from the seemingly little things?

I grabbed:

Potatoes, Nacho Cheese, Ground Beef, Pancake Mix, Butter, and Tony Chacheres Creole Seasoning (while your at it, go ahead and chop up some Onions and Bell Pepper).

 
What a wide range of stuff huh? What exactly did I make?

 
I call it: Potato and Beef Pie

 
1. In a skillet, season and begin cooking the ground beef.

 
2. While the ground beef is cooking, cut your potatoes into squares, set aside.

 
3. Next, lubricate a baking dish with the butter. Make sure it covers the entire pan on all sides.

 
4. Your ground beef should be done now. Make sure it’s well done. Set Aside.

 
5. Make a pancake batter. (Make sure to add an egg or two). Be sure that it’s a thin mixture. If it’s too thick, add more water or milk but make sure it’s nice and thin.

 
6. Coat the baking dish with the batter. This is your crust. Using pancake mix adds a better flavor to me than regular flour. Plus, this is supposed to be a recipe made up of random foods around the house.

 
7. Heat the Nacho cheese so that it’s nice and smooth

 
8. Layer the dish: Add Ground Beef, Onions and Bell Peppers, Nacho Cheese, and Potatoes

 
9. With the leftover Pancake Batter (you may have to make more), coat the entire dish with the batter. This is your top crust.

 
10. Place this dish in the oven and bake uncovered at 350 degrees F. for one hour.

 
Regrettably, I did not take pictures so I cannot show you the end result. But when you take it out of the oven it should be a nice golden brown with delicious goodies tucked on the inside. You should be able to slice into squares or triangles or whatever shape and eat like a pie. The cheese provides just enough moisture for it not to be dry and the beef provides just enough meat to be filling. It was delicious.

 
This is an easy and efficient meal that even the kids will love. A vegetarian version can be made also. Just substitute the ground beef with ground Mung Bean, a good meat substitute.

Recipe Sunday – One Dish Blackberry French Toast

blackberry-casserole-sl-1932538-x

If you’re anything like me you love French toast! I actually enjoy them more than pancakes. Pancakes are too filling for me, I can only enjoy like two with additional sides before I’m filled to the brim. But French toast is such a light delicate sweet treat. And what I love about this recipe is that it puts me into the mind of a breakfast casserole. Not to mention it’s super easy to make. Prepare your taste buds to simply go wild. For this recipe we’ll need:

• 1 cup blackberry jam
• 1 (12-oz) French bread load, cut into 1 1/2 inch cubes
• 1 (8-oz) package 1/3 less fat cream cheese, cut into 1 inch cubes
• 1 Large Eggs
• 2 cups half and half
• 1 teaspoon ground cinnamon
• 1 teaspoon vanilla extract
• 1/2 cup firmly packed brown sugar
• Maple Syrup
• Whipped Cream

1. Cook jam in a small saucepan over medium heat 1 to 2 minutes or until melted and smooth, stirring once.

2. Place half of bread cubes in bottom of a lightly greased baking dish. Top with cream cheese cubes, and drizzle with melted jam. Top with remaining bread cubes.

 
3. Whisk together eggs and next 3 ingredients. Pour over bread mixture. Sprinkle with brown sugar. Cover tightly, and chill 8 to 24 hrs.

4. Preheat oven to 325. Bake covered for 20 minutes. Uncover and back another 10-15 minutes or until bread is golden brown and mixture is set. Serve with desired toppings.

Now, I’ll turn my head so you can eat 🙂

Recipe Sunday – All Natural Homemade Deodorant

deodorant

Today’s Recipe Sunday comes from an ingredient given to me by a sister of mine. For the record she’s more into this kind of stuff than I am. I love natural hair, toothpaste, shampoo, soap and stuff like that, but I’m not so sure I’m on the whole natural deodorant bandwagon. I don’t particularly like to sweat though your naturally supposed to, and I’m not all that into the smell of my own DNA. However, this is a really nice ingredient for all you naturalist out there; smells good and very simple to make. You will need:

1/4 cup Baking Soda
(don’t you just love this stuff? It’s good in practically anything)
1/4 cup Arrowroot Flour OR Cornstarch / Potato Starch
6 tbsp. Coconut Oil
Essential Oil of choice

Step 1: If your Coconut Oil is solid, melt it slightly. Here’s how I do mine:

Take a piece of foil paper and a skillet. Line the skillet with the foil under a low flame. It will melt quickly, smoothly, and a lot less messy than the microwave.

Step 2: Mix the Baking Soda, Arrowroot Flour, and Coconut Oil together into a smooth paste. Make sure it’s nice and smooth. No lumps allowed.

Step 3: Add an essential oil of your choice for fragrance

Step 4: Store in your jar of choice in a nice cool place. If it gets too warm it will melt into a liquid. Do not store in the refrigerator or it will also melt into a liquid after it thaws. Just store it in a nice cool place. You can actually use this right away too.

Pros and Cons:

The positive about natural deodorant is that it lasts longer. After the initial shock of getting used to wearing it, you actually don’t have to use it every day and because sweat doesn’t make you smell, you won’t be musty. And while you will sweat, sweat is normal and good for you. It cools down the body, removes toxins, helps you to breathe better, improves circulation, and your metabolism accelerates.

The negative about natural deodorant, in my opinion, is that while it last longer, you will sweat and this can be the cause of an unpleasant smell and I just don’t play that. But, let me be fair: The sweat itself does not smell actually; the smell comes from the bacteria in your skin breaking down the sweat secretions released from the sweat glands. So it really depends on finding that happy medium of what works for you. While sweat itself does not smell, sweating more can make you smell even though it’s not the sweat that stinks but the bacteria that works with the sweat. Hope I didn’t confuse anyone there, but I think you so get it. 🙂

Recipe Sunday: Spinach, Onion, and Swiss Frittata

l210500737I know, Recipe Sunday is mad late, but, better late than never is what they say. I am dying to get into this one though. I decided to switch it up a bit so this is a breakfast recipe. You can however make it a dinner if you’re a 24 hour breakfast eater like me. I’ll make pancakes and eggs for dinner in a heartbeat. But enough about me, you will need:

2 Teaspoons canola oil
2 Cups vertically sliced onion
4 Cups baby spinach leaves
8 Large eggs, lightly beaten
¼ teaspoon salt
¼ teaspoon black pepper
3 (3/4th cup) shredded Swiss cheese

1. Pre-heat oven to 400 degrees.

2. Heat a 10-inch ovenproof skillet over medium heat. Add oil; swirl to coat. Add onion; sauté 10 minutes or until tender. Add spinach; cook 2 minutes, stirring just until spinach withers.

3. Combine eggs, salt, and pepper. Pour egg mixture over vegetables in pan; cook until edges begin to set, about 2 minutes. Gently lift edge of egg mixture, tilting pan to allow uncooked egg mixture to come in contact with the pan. Cook 2 minutes or until egg mixture is almost set. Sprinkle with cheese.

 
4. Bake at 400 degrees for 8 minutes or until center is set. Transfer frittata to a serving platter immediately; cut into shape of choice and devour. 🙂

Beef Stew in Red Wine Sauce

It really don’t make no sense how good this looks. Beef stew anyone? We’ll need:

DSC_0351

• 1 tablespoon unsalted butter
• 2 tablespoons olive oil
• 2 pounds trimmed beef flatiron steak or chuck, cut into 8 pieces
• Salt
• Freshly ground black pepper
• 1 cup finely chopped onion
• 1 tablespoon finely chopped garlic
• 1 tablespoon all-purpose flour
• One 750-milliliter bottle dry red wine
• 2 bay leaves
• 1 thyme sprig
• One 5-ounce piece of pancetta
• 15 pearl or small cipollini onions, peeled
• 15 cremini mushrooms
• 15 baby carrots, peeled
• Sugar
• Chopped fresh parsley, for garnish

1. Preheat the oven to 350°. In a large enameled cast-iron casserole, melt the butter in 1 tablespoon of the olive oil. Arrange the meat in the casserole in a single layer and season with salt and pepper. Cook over moderately high heat, turning occasionally, until browned on all sides, 8 minutes. Add the chopped onion and garlic and cook over moderate heat, stirring occasionally, until the onion is softened, 5 minutes. Add the flour and stir to coat the meat with it. Add the wine, bay leaves and thyme, season with salt and pepper and bring to a boil, stirring to dissolve any brown bits stuck to the bottom of the pot.

2. Cover the casserole and transfer it to the oven. Cook the stew for 1 1/2 hours, until the meat is very tender and the sauce is flavorful.

3. Meanwhile, in a saucepan, cover the pancetta with 2 cups of water and bring to a boil. Reduce the heat and simmer for 30 minutes. Drain the pancetta and slice it 1/2 inch thick, then cut the slices into 1-inch-wide lardons.\

4. In a large skillet, combine the pancetta, pearl onions, mushrooms and carrots. Add the remaining 1 tablespoon of olive oil, 1/4 cup of water and a large pinch each of sugar, salt and pepper. Bring to a boil, cover and simmer until almost all of the water has evaporated, 15 minutes. Uncover and cook over high heat, tossing, until the vegetables are tender and nicely browned, about 4 minutes.

To serve, stir some of the vegetables and lardons into the stew and scatter the rest on top as a garnish. Top with a little chopped parsley and serve.

– Contributed by Jacques Pépin

Books Every Woman Should Own

One of the things very few people know about me is that I’m a Certified Medical Assistant with a focus in Phlebotomy. I’ve also been trained by the American Heart Association for Pediatric First Aid, and Adult CPR. No one knows this because I simply don’t talk about it. I don’t offer too much information about myself unless I feel it is warranted. Plus, writing is way better.

Anyway, I can’t remember the last time I was really sick. Whether we’re talking about flu’s, colds, it’s been awhile and it’s been awhile for my husband as well. That’s because if you look around your house, there is probably a cure to almost everything you would normally run to the doctor for. In fact, there’s pretty much nothing you cannot cure with Herbs and a little bit of common sense.

Below are some books I have collected over time that I think every woman, especially every mother, should own:

Herbally Yours by Penny C. Royal:

41iVF1PuDwL

I call this book the “No Strings Attached” Herb book because it is literally a complete list of Herbs and Herbal combinations you could use for a variety of ailments without an agenda. With the exception of the introduction (which I opt to just skip), it is an alphabetized list of natural herbs to help with anything from High Blood Pressure to Infertility. It is also easy to follow. You can probably find it for real cheap on Amazon. My mother’s name is also Penney so it’s possible I’m just being biased :).

Home Remedies Health Handbook by John H. Renner, M.D., and the Consumer Health Information Institute:

ms7tXUaG8s2Lieqe5Ex4V2g

This book is a great compliment to Herbally Yours. If you buy Herbally Yours you have to buy this one too. That’s because while Herbally Yours gives you the list of Herbs to use, this one actually shows you how to use it! It’s got a lot of cool tips and gives you practical knowledge on how to care for over eighty common health problems. From constipation to tooth aches, the common cold and even diaper rashes, this book’s got you covered.

Natural Cures and Gentle Medicines by the editors of FC&A

$_35

This book is great on information about diseases and common aches and pains. It has information on Alzheimer’s disease, Asthma, and even exercises to escape back pain. And get this: there’s even something in here on hiccups! That’s right, there are things you can do to stop hiccups. One exercise I do that works for me is that when I feel a Hiccup coming on I hold my breath. I know I know you’ve heard this before. But the trick to it is being able to hold your breath long enough. Hiccups occur when a ripple contracts the diaphragm, a large sheet of muscle that separates the chest cavity from the abdominal cavity. This spasm causes an intake of breath that is suddenly stopped by the closure of the vocal cords. This closure causes the “hiccup” sound because there is a blockage of air. That’s why while hiccups happen out the blue; most people get them (myself included) when they eat too quickly. But if you relax, breath in, and hold your breath for a few seconds it’ll help stop the hiccups. This isn’t in the book this is just what I’ve found works best for me personally. You can actually feel the food going down too if you do it right and the hiccup goes away.

Now, there’s one book I do have, but that I do not want to recommend. The only reason I have it is because we’ve had it for awhile. To each it’s own so if you feel like confusing yourself you can go ahead and Google it. Llaila O Afrika’s African Holistic Health. It has some interesting health information in it, however he mixes too much of his own doctrine in with the information. I don’t like when people take stuff too far, you have to maintain a proper balance in your life. It’s one thing to want to learn more about your health as it relates to your cultural and ethnic background, but when you start assuming that everything black is good and white is bad that crosses the line. That doesn’t even make any sense. If you’re going to give information about how unhealthy white bread is do that. But don’t just say that it’s unhealthy because it’s white. Denote the unhealthy aspects of this food to what actually makes it unhealthy. Tell me that white bread is made from refined white flour containing several unwholesome constituents; tell me that though it’s produced from the whole wheat grain it is then subjected to the refining process which removes all traces of the husk, or bran and along with it all the goodness contained in the grain. But also tell me that it is not that which goes into the body that defiles the man but what comes out and that there are still some good aspects of the white bread. This is called balance. Don’t take it too far and don’t take it too lightly. To put it mildly, the books A-Z Herbs for Diseases and explanations on what causes them is good information, but too much of the book is filled with his own philosophy and that’s a dangerous combination in the research department. There are actually right and wrong ways to research and those who are not careful can easily get themselves highly confused. For example, in section 16: Holistic Perspectives the man said:

“Kissing is a European sexual and friendship custom…African men kiss each other and African women kiss each other because kissing is a spiritual custom. Caucasian kissing between men and women is primarily sexual.”

What?

Where are you getting this information from? This is what I’m talking about. You can’t go around just making up stuff. In the end I get the feeling I’m being indoctrinated into some Afrocentric Egyptology instead of learning about health which can lead astray those not rooted in the truth and is in turn counterproductive to the purpose of picking up the book in the first place.