
I didn’t plan on sharing this but as I was editing some mock-ups I thought it would be nice to share what I am doing.
I am not a professional photographer, and I don’t always have a chance to take professional images. Therefore, I love using free mock-up templates to create professional images of my books. I am learning Photoshop also because if I can master it, I can also start to create my own book covers! (OK, that’s a far way off but a sista can dream).
But, while I am finagling (am I the only one who thinks finagle is a funny word?) around with this, I decided to put together a quick tutorial on what I am doing for those of you who use Photoshop. It’s super easy and if you have Photoshop, you should be able to get started right away.
Note: I’m not a professional “Photoshopper” and have instead found my own way of editing mock-ups because this way is easier for me but there are lots of other ways to do this.
Step One
Get Photoshop. You can get Photoshop CC for as low as $10/month. For me it’s worth the money because I use mock-ups often. However, there is a free trial you can use for seven days if my memory serves correctly. http://www.adobe.com/ (There are also plenty of free ways to create 3D images. I use Photoshop because the quality of the images is top notch.)
Step Two
Once you have Photoshop, find a free mock-up that you like. Be sure the license allows you to use it. Most of them do as long as you don’t try to sell the mock-up as your own. You can find some great ones at http://covervault.com/
Step Three
Download a mock-up you like. I’m going to use this one.

Step Four
Click on the zip file and double click on the Photoshop file to open it.

OK so you can pretty much change anything on here to make it your own. Eliminate the background, upload your own images, change colors, etc. But…
I’m just gonna show you how to change the book covers.

Step Five
Go to the side panel here. Let’s start with the front book cover. Click on the arrow next to Front Book, scroll down to front cover and double click on the space where the front book cover is…right where my arrow is.

It will bring up the mock cover here..

Step Six
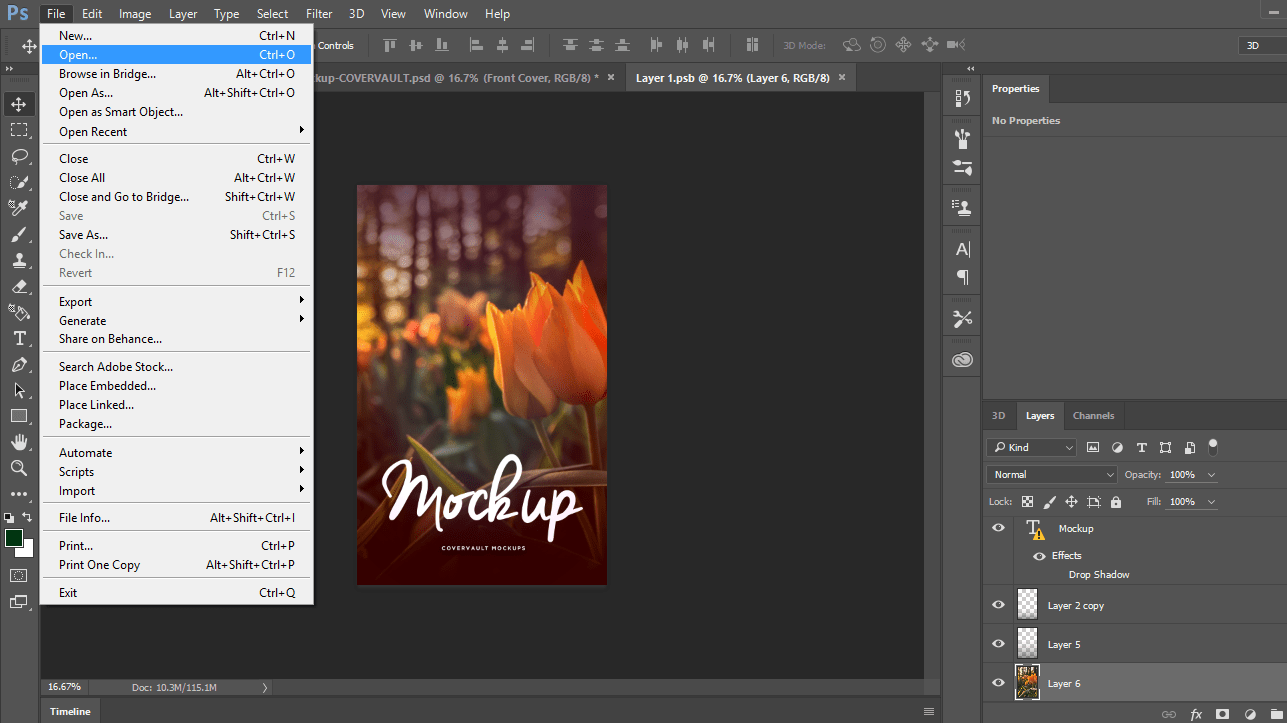
File > Open > Find the cover (or image) you’d like to use on your computer and click on it….and
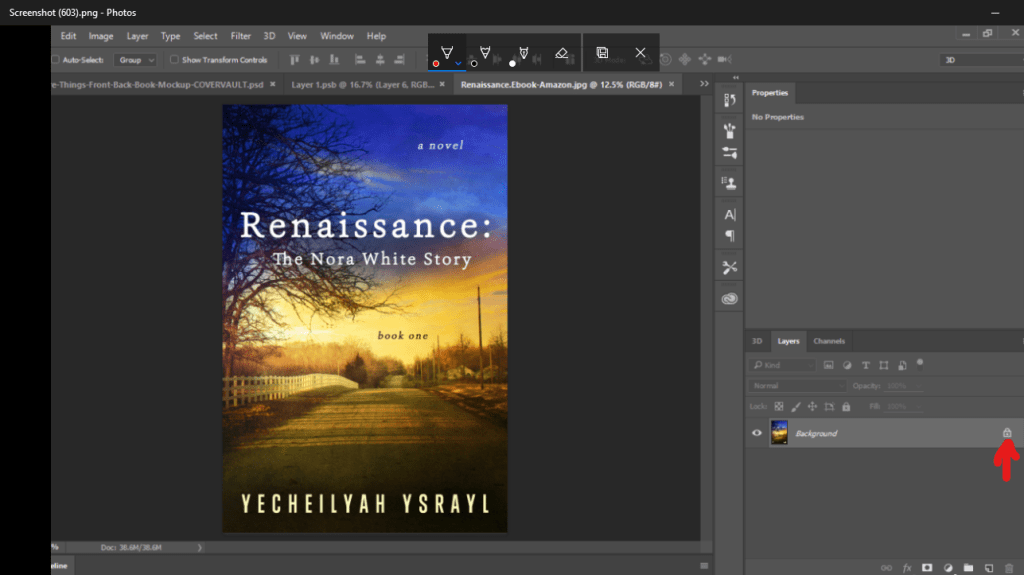
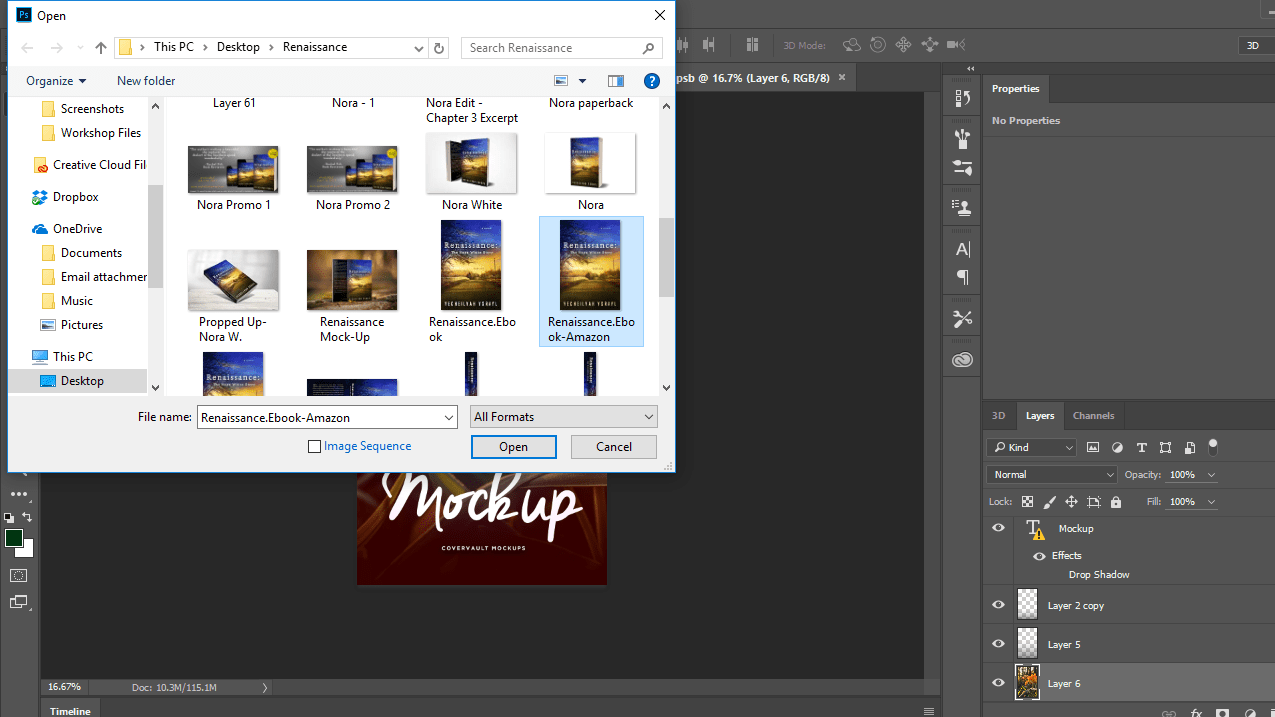 It will open in Photoshop. When it does, unlock it at the bottom. If you don’t unlock it, you cannot edit it.
Step Seven
Click on your cover and drag it to the mock layer.
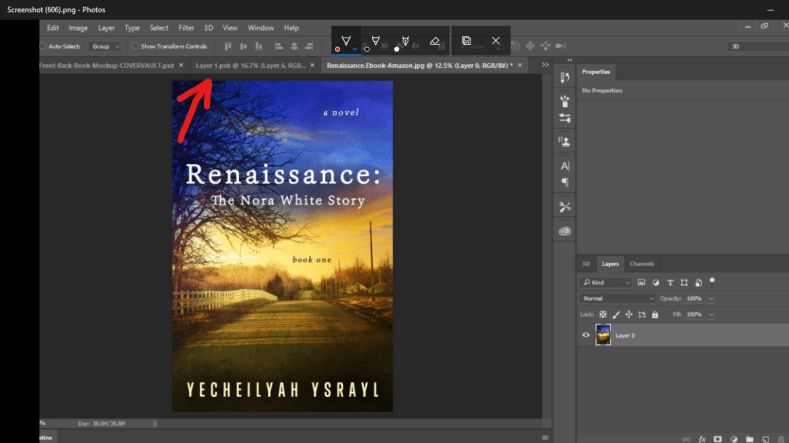
Step Eight
This one has lots of special effects I don’t need. If ever you don’t want something in the image you can either delete the layer or hide it. Click on the eye next to the layers to hide them. I want to hide the mock-up text and other things…

If you did it correctly it should leave only your cover and look like this (below)…if you look at the layers next to where my marker is you will see that the eye is closed. This means I am hiding these layers so they don’t show.

Step Nine
As you can see, when you move your cover to the layer (see step seven) it will be too big. On your MAC click command T to highlight it to resize. On PC click ctrl T. Now just resize it to fit the space.

Step Ten
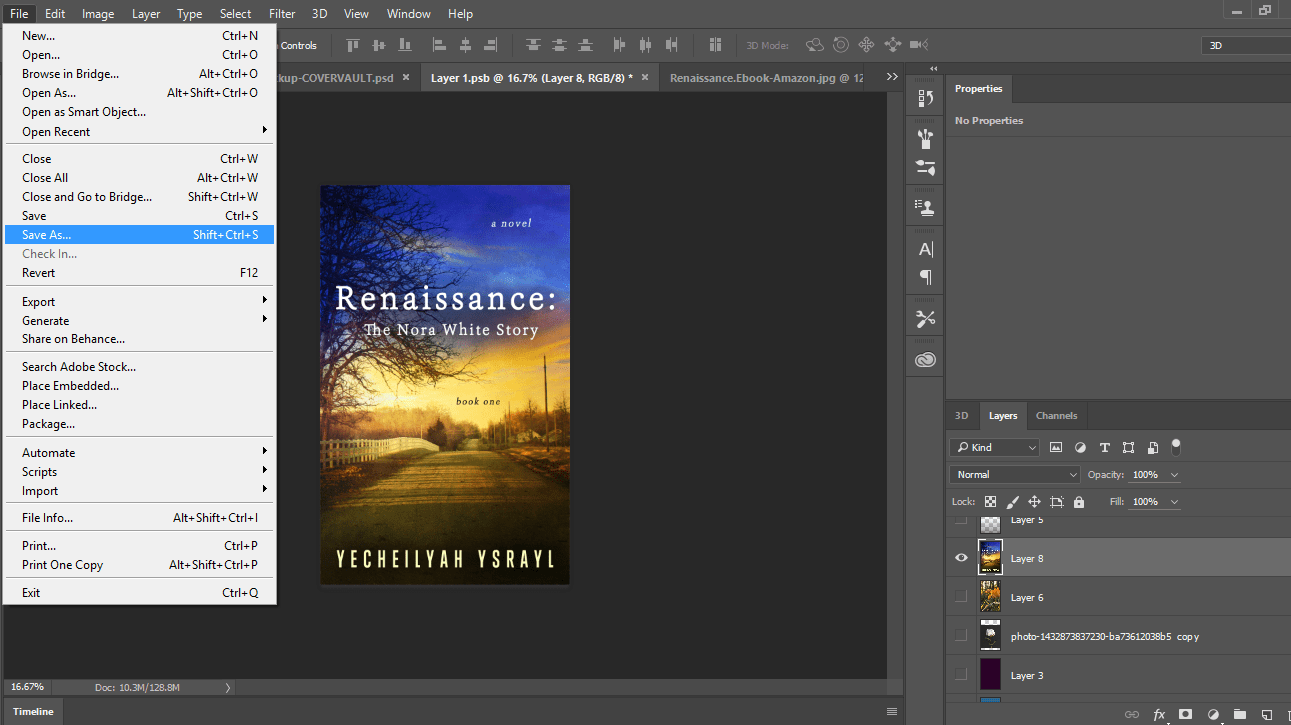
Save your resized cover. File > Save as (save it under a name you will recognize. You will need to remember where you saved it.)
Step Eleven
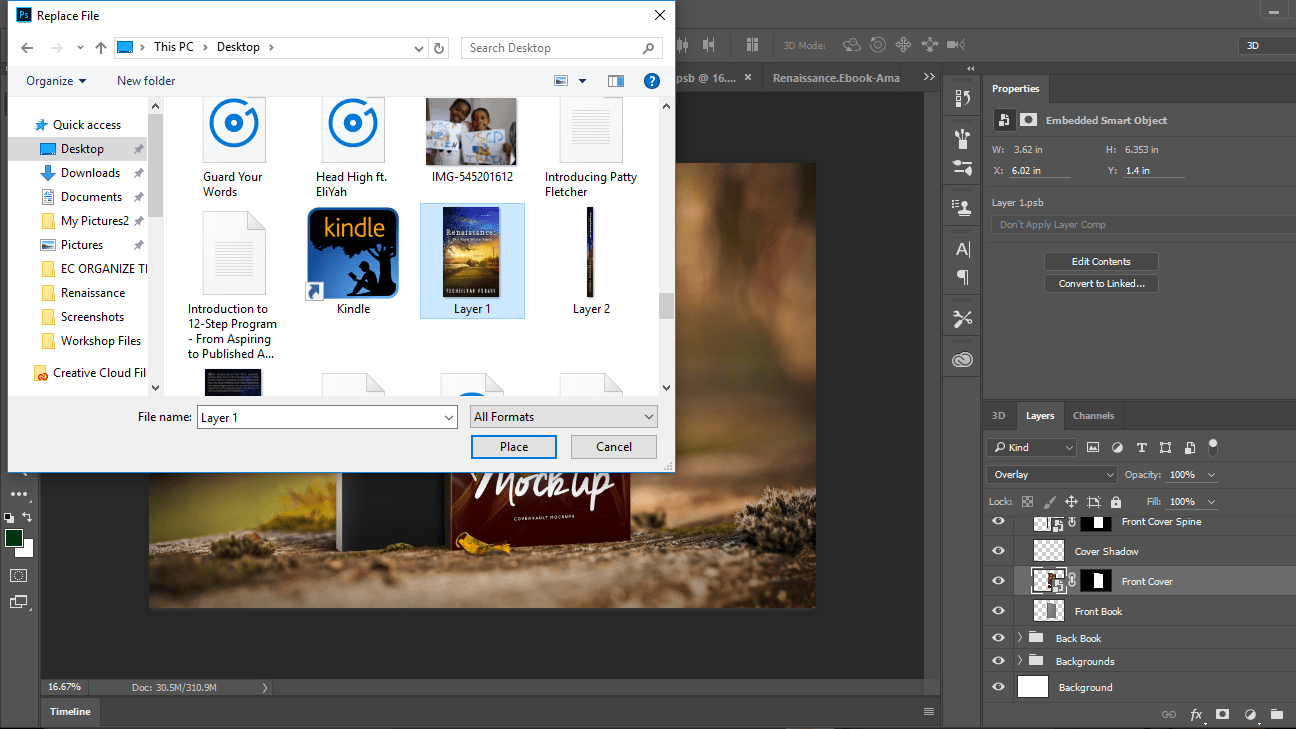
Go back to the panel and right click in the space next to the front cover.

Step Twelve
If you did it correctly, it should bring up the box below…where you see replace contents, click on that.

When the box opens, find your saved image from Step Ten and replace the mock image with your own.
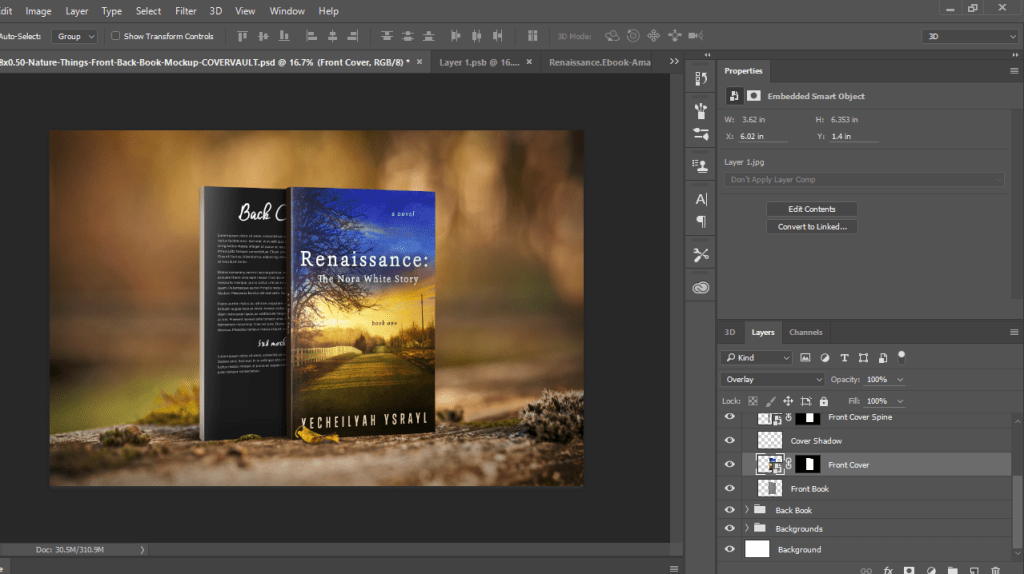
And that’s it!
For the back cover follow the exact same steps:
- Click on the arrow next to back cover.
- Double click on back cover
- File > Open > Choose the image for your back cover
- If it’s locked, unlock it
- Click and drag your cover to the mock layer (you can’t move it if it’s locked)
- Hide any layers you don’t need/want
- Resize image > Command T (MAC) or Ctrl T (PC)
- File > Save as to your PC
- Back to the panel, right click in the space next to the back cover > Replace contents
- Find saved image > place
The last thing you will do when you have both the front and back cover done is to File > Save as > PNG
You’re done.


Leave a Reply